Searching for how to clean a printer drum? A drum is always evaluated as the most crucial element. Hence you need to follow particular steps and precautions with care in cleaning a printer drum.
What to wait for? Let’s get started to understand the procedure of cleaning a printer drum.
How To Clean A Printer Drum
Here we will talk in details about how to clean a printer drum. Let’s start by looking at the ingredients.
Required apparatus
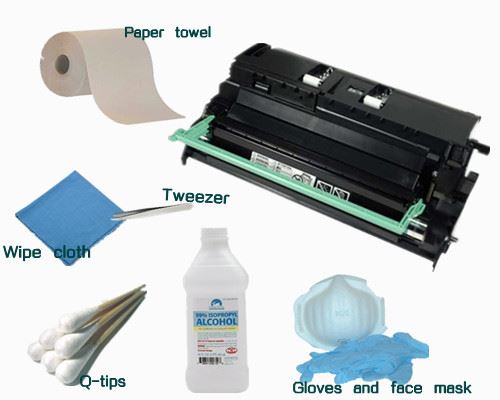
You need to keep all the required apparatus before starting the process. The main components to clean a printer drum are
- Isopropyl alcohol,
- A soft cloth or cotton balls,
- Tweezer
- paper towels, and
- free clothes.

Steps To Follow In Cleaning A Printer Drum
Step-1: Switch off your printer
Before taking your printer drum, switch off your printer to avoid electric shock. Even if you have worked on it previously, wait for some time to let the printer cool down. All the components inside the printer drum should be at normal temperature.
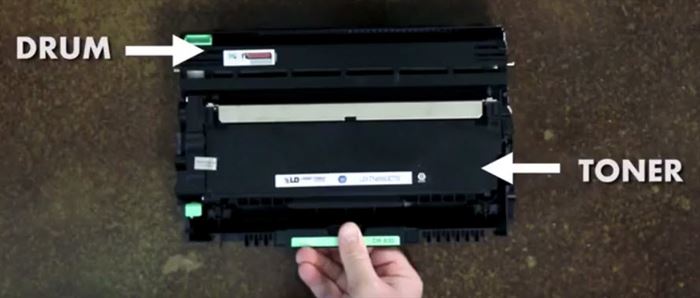
Follow the instruction guide manual to take the printer drum out to avoid damage. Because the procedure may not be the same for all the printers for removing printer drums. If there are any important points. You should certainly follow.
Step-2: Inspection of drum
Now keep the printer drum on a paper towel or any smooth surface. Check for damages all over the drum. If there is any damage to your drum, you can’t continue cleaning.
Once the drum is damaged, you can’t get it repaired. You can start the cleaning process only after confirming no damages to your drum.
Step-3: Cleaning of drum
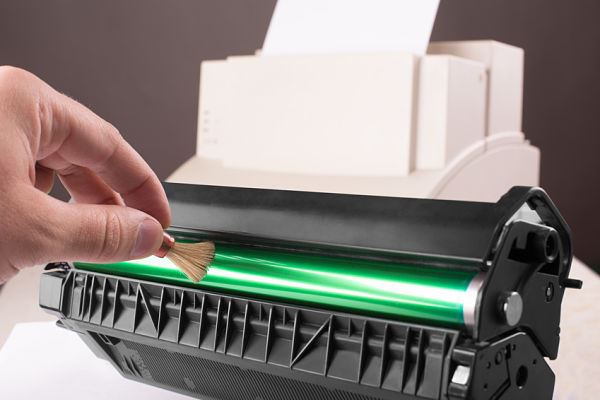
You may have lump amounts of toner on your drum unit. Do not clean them with your hands or using any cloth. Clean the toner using tweezers carefully. Make sure you should not leave any marks or make any scratches to it.
Now soak a soft cloth in isopropyl alcohol. After two minutes of dampening, remove and squeeze it. Then gently wipe the drum exterior part with equal pressure on all the sides. Always remember to wipe it in a single direction only.

Step-5: Inspect again and the drying process
After cleaning the surface, carefully inspect the whole drum unit. Isopropyl alcohol is a quick solvent that evaporates quickly. It also doesn’t leave any residues over the surface. If there is any dirt leftover at the edges or surface, clean it gently and carefully.
Now let the drum dry out completely before placing it inside the printer.
Once the printer drum completely dried out, again make use of the instruction manual to keep the printer drum inside.
Step-6:Testing process
Do not start printing immediately after keeping the drum inside. Let it warm up for 2 minutes. After warming a bit, now start printing with one or two pages. If any streaks are occurring with printing, test again.
Print again one or two pages. There is a possibility that the printer drum may damage during the process of cleaning. So still, if it doesn’t work, the printer drum gets damaged and you have to buy a new printer drum.
It may also be because the drum is exposed to the light so much. Light is also an important factor that plays a role here. Exposure to light and radiation can damage the printer drum easily.
Now let’s have a look at some of the related questions.
What Are The Liquids That Can Be Used For Cleaning The Printer Drum?
The liquids that can be used for cleaning the printer drum should be quick solvents like isopropyl alcohol, hydrogen peroxide, acetone, etc. Because after the cleaning process is done, the surface needs to be evaporated as early as possible.
Cleaning with an isopropyl alcohol solution is a good option among all the solutions. It does not leave any marks after cleaning.
Can We Repair A Printer Drum If It’s Damaged While Cleaning?
No, you can’t repair a printer drum once it’s damaged. If the printing is not good in the testing phase, leave it for a few more minutes. Again start printing after a while. Still, if it’s not working, you don’t have any option left apart from buying a new drum.
Follow the steps carefully while you are doing the cleaning process to avoid damage and scratches. Though the process is delicate, you can follow the precautions while cleaning to reduce the possibility of damage.
What Are The Precautions That You Need To Follow While Cleaning A Printer Drum?
- Do not leave any fingerprints anywhere during the process.
- Do not touch the surface of the printer drum while cleaning.
- Be extra careful and attentive while you are cleaning the drum surface.
- All the drums are extremely sensitive to light, so don’t expose the drum to the sunlight so much.
- If there is any necessity to store the drum, preserve the drum in a cool, dark place.
- You can also clean the drum without removing it from the cartridge. But to clean the whole drum unit completely, you need to follow the above steps carefully.
- Do not forget to make use of the instruction manual while you are removing from the cartridge and while you are keeping it inside the cartridge.
- Do not hold anything while you are cleaning with your bare hands. Make use of the tweezers and handlers.
- Always test the printer drum first after cleaning. If it doesn’t work properly in the testing phase means you need to replace a new one.
- Isopropyl alcohol reacts to heat elements so fast. So it is important to keep it away from fire.
- After finishing the cleaning process, it is advisable to leave everything for a while to allow all the elements to settle down completely.

Conclusion:
Hope you have understood the steps of how to clean a printer drum. During the process, you have to remember that you need to perform the steps with extreme care as a small mistake while cleaning a printer drum may damage it completely.
We articulated all the instructions in a clear, clean procedure. Hope it helps you in cleaning your printer drum.
You May Also Like:


