Home Printer Maintenance Tips
Complete Care Guide | Preventive Maintenance, Cleaning, Troubleshooting & Seasonal Tips to Extend Printer Lifespan
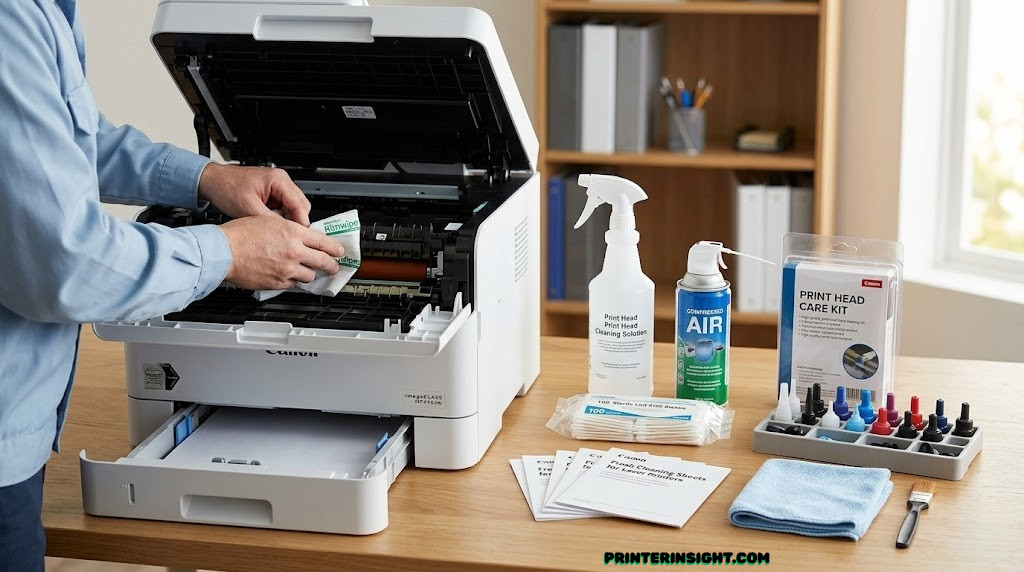
Introduction: The Importance of Printer Maintenance
Your printer is an investment that pays dividends only when working properly. Yet many people treat their printers as if they’re disposable—set it up, use it until it breaks, and buy a new one. This approach wastes money and frustration.
Regular maintenance adds years to your printer’s lifespan, prevents costly repairs, reduces quality issues, and ensures reliable operation when you need it most. The effort required is minimal—mostly simple habits requiring just minutes per month—yet the benefits compound significantly over your printer’s lifetime.
This guide covers preventive care, cleaning techniques, troubleshooting strategies, and maintenance schedules for both inkjet and laser printers. Whether you own an entry-level machine or premium equipment, these practices will help you maintain peak performance and protect your investment.
Why Printer Maintenance Matters
Printers are complex devices with mechanical parts, electronic components, and consumables that interact in precise ways. When any element degrades, the entire system suffers. Understanding why maintenance matters motivates you to actually do it.
Preventing Expensive Failures
Print head clogs, drum damage, paper jams, and mechanical failures cost $100–$300 to repair—often exceeding the printer’s value. Prevention costs almost nothing compared to repair costs. A $2 cleaning solution today prevents a $200 service call tomorrow.
Maintaining Print Quality
Inkjet nozzles accumulate dried ink residue. Laser drums collect toner dust. Both degrade output quality until cleaning restores performance. You’ll notice slight quality degradation for months before recognizing the problem, then struggle with frustrating prints. Regular maintenance prevents this slow decline.
Ensuring Reliability When Critical
Your printer inevitably fails right when you need it most—printing important documents, shipping labels, or school projects on deadline. Preventive maintenance reduces failure probability dramatically. Simple care habits turn your printer into dependable equipment you can trust.
Protecting Your Investment
If you spent $300 on a printer, wouldn’t you maintain it to protect that investment? You wouldn’t skip oil changes in a car, yet many people ignore printer maintenance entirely. View maintenance as protecting what you’ve purchased.
Extending Lifespan Beyond Expected Lifespan
Well-maintained printers often operate 2–3 years longer than industry average. Replacing a printer costs $200–$700+. Extending lifespan another two years through simple maintenance represents significant savings.
The Maintenance ROI
Spending 30 minutes monthly on printer maintenance and $10–$20 annually on supplies prevents failures costing hundreds, extends lifespan by 2–3 years, and ensures reliable operation. The return on investment is enormous—maintenance essentially pays for itself immediately through prevented failures.
Daily & Weekly Care Habits
The foundation of printer longevity is simple daily habits requiring no special knowledge or supplies—just consistent care that protects your device from common hazards.
Proper Paper Handling
Most paper jams result from improper loading or low-quality paper. Use the correct paper type for your printer—office paper for documents, photo paper for images, cardstock for heavy projects. Load paper carefully, fanning the stack to separate sheets before inserting into the tray. Keep paper in dry conditions; humidity causes curling and jams.
Remove paper jams carefully by following your printer’s manual. Never pull paper if stuck—this damages internal mechanisms. Use the recommended access panels and unjam procedures specific to your model.
Power Management
Use the printer’s power button rather than unplugging the device. Sudden power loss can corrupt settings or damage electronics. However, don’t leave printers in sleep mode indefinitely—power down after extended periods without use. Monthly complete power cycles (turn off for 30 seconds, then back on) help clear temporary glitches.
Environmental Control
Keep printers in cool, dry environments (ideally 60–75°F, 30–50% humidity). Temperature extremes and moisture damage components and consumables. Avoid placing printers near windows (sunlight fades inks), radiators (extreme heat), or humid rooms (moisture causes rust).
Protect printers from dust using manufacturer covers during extended downtime. Dust accumulates on paper paths, rollers, and electronic components, causing mechanical problems.
Gentle Usage
Don’t force paper in or remove it when the printer is operating. Let machines complete cycles before opening covers. Close access doors gently—forcing them damages internal mechanisms. Treat your printer as precision equipment, not rough office gear.
Regular Use Schedule
Inkjet printers particularly benefit from regular use. Printing 2–3 pages weekly keeps ink flowing through nozzles, preventing drying and clogging. If you print sporadically (once monthly), run a cleaning cycle before major print jobs to clear accumulated dried ink.
Laser printers are less sensitive to inuse patterns but still benefit from weekly operation when possible.
Daily Care Checklist
- Use proper paper type for your printer
- Load paper correctly and carefully
- Keep work area clean and dust-free
- Use printer’s power button (don’t unplug)
- Close covers and doors gently
- Clear jams using proper procedures
- Keep environment temperature-controlled
Inkjet-Specific Maintenance
Inkjet printers require specialized care because of their liquid ink and precision nozzles. Understanding inkjet-specific issues helps you prevent common failures.
Print Head Maintenance
The print head is your inkjet’s most critical component—and most vulnerable to problems. Dried ink clogs nozzles, preventing proper spray patterns. Most printers include automatic cleaning cycles accessible through the maintenance menu. Running these cycles weekly (or monthly for light users) keeps nozzles clear.
However, automatic cleaning consumes significant ink. Minimize these cycles by maintaining regular printing. If you take 2-week breaks between printing sessions, run a cleaning cycle before resuming work. Occasional light use means frequent cleaning cycles, which becomes expensive.
Nozzle Check Patterns
Use nozzle check patterns (available in your printer’s settings) to diagnose clogging. These test prints show if any color channels are blocked. If patterns show missing colors or streaks, run a cleaning cycle. Catching clogs early prevents complete nozzle blockage requiring expensive service.
Ink Cartridge Care
Handle cartridges carefully—don’t remove them unless replacing. Exposure to air and light degrades ink quality. Keep replacement cartridges in cool, dry storage with protective caps intact. Never let cartridges sit empty in the printer; dried residue hardens and damages nozzles.
Install fresh cartridges promptly when old ones empty. Extended periods without ink causes air to enter the system, creating vapor locks that require expensive service to clear.
Preventing Drying Issues
The biggest inkjet enemy is dried ink. Store idle printers with caps closing access ports. If your printer sits unused for months, run cleaning cycles and nozzle checks before resuming printing. Occasional printing (weekly) prevents drying automatically.
For printers used sporadically, consider covering them with manufacturer covers between sessions. Storage caps and covers keep air from reaching components that dry out when exposed.
Heat Management
Inkjets generate modest heat. Ensure adequate ventilation around your printer—don’t block air vents. Excessive heat degrades ink quality and electronics. During heavy printing sessions, monitor printer temperature. If you’re printing 100+ pages continuously, the device may overheat. Allow cooling breaks between large jobs.
Related guide: Learn detailed strategies for preventing inkjet printer drying out and how to clean printer heads properly.
Laser-Specific Maintenance
Laser printers are mechanically robust but require different care than inkjets. Understanding laser-specific components helps you maintain peak performance.
Toner Management
Toner cartridges rarely require anything beyond simple replacement. However, ensure you’re using genuine cartridges (third-party can cause issues) and install them properly. When cartridge is low, you may see “toner low” warnings but the printer still functions—don’t remove the cartridge until it actually stops printing, as premature removal can introduce air into the system.
Store replacement toner in cool, dry conditions. Toner absorbs moisture, which affects quality. Extreme temperatures (above 90°F or below 50°F) degrade toner performance. Keep cartridges in their protective bags until use.
Drum and Fuser Care
The photosensitive drum and fuser assembly are the laser printer’s most expensive components. Protect them through proper use and occasional cleaning. Never open the toner compartment while the fuser is hot—let the printer cool for 15 minutes after use.
Some printer models include toner waste container that requires occasional emptying. Follow your manual’s instructions for this—excessive toner accumulation reduces print quality. Never dispose of toner down drains; use appropriate waste containers.
Regular Toner Wipe-Down
Over time, toner dust accumulates inside the printer around the drum and transfer areas. Most laser printers include a toner waste container that captures excess. Some models benefit from occasional manual cleaning—using the printer’s self-cleaning cycle if available. Check your manual for specific cleaning procedures; they vary by model.
While opening the drum compartment, avoid touching the shiny photosensitive surface (the drum). Fingerprints cause permanent damage. If you must touch internal components, wear cotton gloves or follow touchless procedures in your manual.
Paper Path Cleaning
Paper residue and toner dust accumulate in the paper path, causing feed issues. Many lasers include cleaning mode that runs paper through to collect debris. If available, use this function quarterly. Some models include cleaning sheets in the supplies kit—follow instructions for running these through the printer.
When Professional Cleaning is Needed
Some laser maintenance tasks require professional service: drum replacement (35,000–100,000 pages depending on model), fuser maintenance, and deep internal cleaning. Don’t attempt these yourself unless your manual explicitly provides procedures. Professional service costs $150–$300 but prevents $500+ damage from improper maintenance.
Related comparison: Understand laser toner vs ink costs and when professional service is cost-effective.
Proper Cartridge & Consumable Storage
How you store ink cartridges and toner between purchases directly impacts quality when you actually use them. Improper storage causes quality degradation, waste, and expense.
Ink Cartridge Storage
Store ink cartridges in original packaging with protective caps intact. Keep them at room temperature (60–75°F ideally) in dry conditions. Never expose cartridges to direct sunlight, which fades inks. Don’t store in bathrooms, kitchens, or basements where humidity fluctuates.
Don’t refrigerate cartridges—condensation forms when cold cartridges warm to room temperature, introducing moisture into ink chambers. Keep cartridges in temperature-stable locations away from moisture.
Shelf life for unopened cartridges is typically 1–2 years depending on manufacturer and storage conditions. Use older cartridges first, rotating stock so nothing expires unused. Check expiration dates when purchasing—avoid very old inventory that may have degraded during storage.
Toner Cartridge Storage
Toner is sensitive to humidity and heat. Store cartridges in their protective bags at room temperature. Don’t expose to direct sunlight or extreme temperatures. Keep storage areas dry—humidity causes toner to clump, which ruins print quality and damages printer mechanisms.
Toner cartridge shelf life is typically 2–3 years. Unlike ink, toner doesn’t degrade rapidly if storage conditions are correct. However, very old toner may have reduced performance.
Maintaining Paper Quality
Paper also requires proper storage. Keep unopened reams in original packaging in dry, temperature-controlled areas. Humidity causes paper to curl and swell, leading to feed jams. Extreme cold makes paper brittle. Heat causes color photographs to fade before printing.
Once opened, store paper in airtight containers in consistent conditions. Reams left exposed to air absorb moisture, especially in humid climates, causing jams and quality issues.
Storage Best Practices Summary
- Temperature: 60–75°F for all supplies
- Humidity: 30–50% (dry is better than humid)
- Light: Avoid direct sunlight for ink and photo paper
- Original Packaging: Keep caps on cartridges, reams in boxes
- Organization: First-in-first-out rotation prevents waste
- Accessibility: Keep commonly used items easily reachable
Learn more about proper cartridge storage to prevent waste and quality degradation.
Cleaning Procedures & Techniques
Beyond running automated cleaning cycles, physical cleaning removes debris and dust that automated systems miss. Knowing proper cleaning techniques prevents damage while improving performance.
External Cleaning
Clean your printer’s exterior monthly using a soft, slightly damp microfiber cloth. Wipe the plastic housing, paper tray, and output area. This removes dust that could accumulate and enter internal mechanisms. Never use harsh chemicals or excessive moisture that could damage electronics.
Pay special attention to paper trays and feed slots where dust accumulates. Use a dry cloth to brush out dust from these areas. Dried ink or toner residue on external surfaces can be gently cleaned with slightly dampened cloth.
Paper Path Cleaning
Every few months, use the printer’s cleaning mode (available on many modern models) or cleaning sheets to clear the paper path. If your printer lacks automated cleaning, manually run several blank pages through to collect debris. For stubborn residue, follow your manual’s instructions for safe access to internal paper paths.
Some printers benefit from gentle brushing of rollers with soft brushes designed for printer cleaning. Never use harsh or abrasive materials—this damages critical components.
Print Head Cleaning (Inkjet)
Use your printer’s maintenance menu to access automatic cleaning cycles. These are the safest method. If automatic cleaning doesn’t resolve quality issues, you may need manual cleaning—follow your specific printer model’s manual as procedures vary significantly.
For aggressive manual cleaning, some users soak print heads in distilled water (never tap water with minerals). This requires removing the cartridge, isolating the print head, and soaking overnight. Only attempt this if your manual provides instructions or you’ve researched your specific model extensively.
Cleaning Safety Notes
Never: Use tap water (mineral deposits damage nozzles), spray cleaners (electronics damage), compressed air on delicate parts (force damage), or insert metal objects into mechanisms.
Always: Power off the printer before opening compartments, let heat components cool, wear cotton gloves if touching internal parts, and follow your manual’s specific procedures.
Dust Filter Maintenance
Some printers include dust filters in ventilation systems. These should be cleaned or replaced every 6–12 months depending on your environment. Dusty environments require more frequent maintenance. Check your manual for filter location and replacement procedures.
Using Cleaning Kits
Printer manufacturers sell cleaning kits containing approved solutions, brush, and cloths specifically designed for their equipment. These are worth the modest cost ($10–$25) compared to potential damage from improper materials. If you invest in manual cleaning, use manufacturer-approved kits rather than generic solutions.
Seasonal Maintenance for Optimal Performance
Seasonal changes affect printer performance. Implementing seasonal care maintains consistency across changing environmental conditions.
Spring Maintenance
As temperatures increase and humidity rises after winter, computers and printers become susceptible to moisture accumulation. Run thorough cleaning cycles in spring, especially for inkjets. Check ventilation systems for dust accumulated during winter. Ensure storage areas aren’t getting humid from spring moisture.
Spring is ideal for replacing print head assemblies if performance has degraded over winter. The warmer, drier conditions that follow replacement help new components establish proper operation patterns.
Summer Maintenance
Heat and humidity peak in summer. Ensure your printer has excellent ventilation and isn’t positioned near heat sources. Monitor temperature during heavy printing sessions—consider scheduling heavy jobs for cooler morning hours rather than hot afternoons. Excessive heat during summer months can trigger thermal shutdowns or reduce component lifespan.
High humidity in summer causes paper to absorb moisture and curl. Store paper in airtight containers. If your location is particularly humid, consider a dehumidifier in your workspace. Humidity particularly affects laser printers during transfer and fusing—high humidity reduces quality.
Fall Maintenance
As seasons transition and heating systems start operating, indoor humidity drops dramatically. This can cause static electricity issues that damage components. Ensure proper grounding and consider antistatic mats for your workspace. Static damage often manifests as intermittent printing failures that seem mysterious.
Fall is good time for preventive cartridge replacement—before winter printing surge and holiday document needs. Don’t start winter with low cartridge levels.
Winter Maintenance
Winter heating systems create extremely dry conditions. Low humidity can cause static issues and dried ink nozzles. Paradoxically, winter also brings moisture problems in unheated storage areas. Keep printers in heated, temperature-stable areas.
Winter is when printing volume typically increases (holiday cards, tax documents, etc.). Ensure your printer is in optimal condition before the surge. Run thorough maintenance before winter: cartridge checks, cleaning cycles, mechanical inspections.
Year-Round Maintenance Rhythm
Monthly: Run cleaning cycles, check nozzle patterns (inkjet), review paper quality and storage
Quarterly: Deep cleaning, cartridge inventory, temperature/humidity review
Seasonally: Adjust for environmental changes specific to your climate
Annually: Professional servicing if needed, parts replacement assessment
Troubleshooting Common Issues
Most printer problems have simple solutions before requiring professional service. Knowing how to diagnose and fix common issues saves money and frustration.
Paper Jams
Paper jams are the most common issue. Follow these steps: First, power off the printer completely. Second, open all access panels following your manual’s guidance. Third, locate the jammed paper and gently remove it in the direction of paper travel—never pull against the feed direction. Fourth, close access panels and power back on.
Recurring jams indicate deeper problems: worn rollers, damaged paper path, or moisture-swollen paper. If jams recur after fixing one, investigate the root cause rather than just clearing the jam repeatedly.
Print Quality Issues
Streaks or missing colors (inkjet): Usually indicates clogged nozzles. Run cleaning cycles via your printer’s maintenance menu. If this doesn’t resolve, you may need manual cleaning or professional service.
Faded or light output (laser): Usually indicates low toner. Replace cartridge. If replacement doesn’t help, the drum may need professional replacement.
Ghosting or double images (laser): Indicates a drum problem requiring professional service.
Blurry output: Check paper quality (glossy papers cause issues with some printers). On laser, ensure the fuser is heating properly (check settings). On inkjet, run cleaning cycles.
Connectivity Issues
Wireless printing failing? First, restart your printer and router. Second, ensure the printer is connected to the correct WiFi network. Third, check that your computer or mobile device is on the same network. Fourth, update printer drivers from the manufacturer’s website. If issues persist, power cycle the router and printer, waiting 30 seconds between steps.
Related guide: Detailed instructions for connecting your printer to WiFi and troubleshooting wireless connectivity.
Slow Printing
If printing is much slower than normal, check: Paper quality (glossy photos process slower than plain paper), print quality settings (highest quality settings slow output), and USB connection stability (loose cables cause slowdowns). Ensure paper feed system is clean (dust accumulation slows mechanics).
Mechanical Noise
Unusual grinding, squealing, or clicking sounds indicate mechanical problems. Common causes: worn rollers, debris in paper path, or loose internal components. Power off immediately and investigate. Don’t continue printing—mechanical failures propagate.
Error Messages
Printer error codes usually indicate specific problems. Check your manual’s error code reference or search your printer model and error code online. Most errors resolve through: power cycle, paper jam clearing, cartridge reseating, or firmware updates. Only proceed to service if errors persist after these steps.
Troubleshooting Checklist
- Power cycle the printer (off for 30 seconds, back on)
- Check for paper jams or debris
- Verify paper quality and loading
- Run cleaning cycles (inkjet) or verification prints (laser)
- Update drivers from manufacturer website
- Clear cartridge protective tabs or seals
- Check WiFi connectivity and network settings
- Review recent changes or updates that might have caused issues
Maintenance Schedule & Calendar
Consistency is key to effective printer maintenance. Use this schedule as your maintenance guide.
Weekly Tasks
- Use printer normally (maintains ink flow & mechanics)
- Check paper tray for dust or debris
- Wipe exterior with dry cloth
Monthly Tasks
- Run cleaning cycles (inkjet)
- Check nozzle patterns (inkjet)
- Review cartridge/toner levels
- Clean paper path with soft brush
- Verify WiFi/network connectivity
Quarterly Tasks
- Deep internal cleaning using approved kits
- Check paper and cartridge storage conditions
- Review temperature/humidity environment
- Run test prints to verify quality
- Check for firmware updates
Annually Tasks
- Professional service inspection (if needed)
- Drum replacement (laser, if required)
- Print head deep cleaning or replacement
- Assess parts needing preventive replacement
- Update all drivers and firmware
Essential Maintenance Supplies
Keep these supplies on hand for regular printer maintenance. Most cost just $20–$40 total and last months.
| Supply | Purpose | Frequency | Cost |
|---|---|---|---|
| Microfiber Cloths | External cleaning, dust removal | Monthly | $3–$8 |
| Distilled Water | Head cleaning (inkjet only) | As needed | $1–$3 |
| Printer Cleaning Kit | Manufacturer-approved cleaning | Quarterly | $10–$25 |
| Cotton Gloves | Protect hands, prevent fingerprints | As needed | $2–$5 |
| Soft Brushes | Paper path, roller cleaning | Quarterly | $3–$8 |
| Compressed Air | Dust removal from electronics | As needed | $3–$7 |
| Printer Cover | Dust protection during storage | Ongoing | $10–$20 |
| Professional Cleaning Service | Deep cleaning when needed | 1–2 times annually | $100–$300 |
Budget tip: Basic maintenance supplies cost under $40 annually for most users. Compare this to even one service call ($100+) or printer replacement ($300+) that proper maintenance prevents.
Frequently Asked Questions About Printer Maintenance
For regular users (printing 2–3 times weekly), monthly cleaning is sufficient. For light users (printing once monthly or less), run cleaning before resuming printing. For frequent heavy users, weekly cleaning may be necessary. Each cleaning consumes ink, so balance prevention against waste. Regular use itself prevents clogging better than cleaning cycles.
Use manufacturer-approved cleaning solutions when possible. Generic solutions may damage components or void warranties. However, distilled water works safely for gentle soaking of print heads if your manual permits. Avoid tap water (minerals damage nozzles) and commercial cleaning products (chemical damage).
Ideal humidity is 30–50%. Below 30%, static electricity damage becomes likely. Above 50%, moisture absorbs into components and paper. In very dry winter conditions or humid summer conditions, printers should be stored in climate-controlled spaces or use dehumidifiers/humidifiers to maintain proper levels.
Power down printers when not in use for more than a few hours. Extended sleep mode strains components. However, daily power cycles (turning on and off) aren’t necessary. The best practice is turning off after use sessions, leaving it off during nights and weekends, and powering on when needed.
First, use quality paper appropriate for your printer. Second, load paper correctly, fanning the stack before inserting. Third, keep paper dry (humidity causes curling). Fourth, clear paper paths of debris regularly. If jams continue despite these measures, worn rollers or damaged feed mechanisms require professional service.
Cartridge yield (measured in pages per cartridge) is based on standard test conditions: 5% coverage (light printing). Real-world usage varies dramatically. Heavy color printing consumes cartridges much faster than the rated yield. Light text-only printing lasts far longer. Track your actual consumption to predict replacement timing accurately.
Consider replacement when: repairs exceed 50% of printer cost, multiple components fail simultaneously, manufacturer no longer provides parts, or it’s over 5 years old with extensive issues. A single clogged print head ($50–$100 repair) on a $150 printer merits repair. Multiple failures on aged equipment suggest replacement is better economics.
No, freezing damages cartridges. Condensation forms when frozen cartridges warm to room temperature, introducing moisture that ruins ink or toner. Room temperature storage in original packaging is correct. Freezing is a myth that actually harms cartridges.
Seek professional service when: self-help troubleshooting fails, error codes persist despite power cycles and manual fixes, mechanical problems appear (grinding noises, jam repetition), or cleaning doesn’t restore quality. Professional service ($100–$300) is worthwhile for quality printers with single-component failures. For cheap printers with multiple issues, replacement is better economics.
No, though manufacturer paper often works best. However, use paper of the same weight and type (glossy, matte, cardstock, etc.). Quality matters—cheap paper has more dust and fibers that jam mechanisms. For specialty media (canvas, watercolor), manufacturer recommendations are worth following. For standard office paper, quality matters more than brand.
Conclusion: Simple Maintenance, Big Rewards
Printer maintenance doesn’t require technical expertise or expensive supplies. Consistent simple habits—keeping your printer clean, using proper paper, maintaining correct environmental conditions, and running occasional cleaning cycles—prevent 90% of printer problems.
Maintenance Discipline Pays Off
Printers that receive regular care print reliably for 5–10 years with minimal issues. Neglected printers fail within 2–3 years despite identical equipment. The difference isn’t the printer—it’s maintenance discipline.
Return on Investment
Spending 30 minutes monthly and $10–$20 annually on maintenance prevents failures costing hundreds, extends lifespan by years, and ensures reliability when you need it. This investment pays for itself immediately through prevented failures.
Creating a Maintenance Routine
Make printer maintenance part of your regular routine. Set monthly reminders to run cleaning cycles. Note seasonal maintenance needs on your calendar. Store supplies where you see them regularly. This visibility turns maintenance from something you forget into something you do automatically.
When Professional Help Makes Sense
Not all problems require DIY solutions. Professional service ($100–$300) makes sense for valuable printers with specific component failures. Attempting complex repairs risks further damage. Know when to call professionals rather than persist with troubleshooting that could cause additional problems.
Start Your Maintenance Plan Today
Use this guide to implement immediate maintenance habits. Mark your calendar for monthly and quarterly tasks. Keep essential supplies stocked. Create a maintenance log tracking what you’ve done—this creates accountability and helps you identify patterns.
For printer-specific guidance beyond general maintenance: