How to Stop an Inkjet Printer From Drying Out Between Prints
There’s a specific kind of frustration in needing one printed page and discovering the printer hasn’t been touched in three weeks. You hit print, the document queues, and what comes out is streaked, faded, or missing colors entirely — because the ink sitting in the nozzles has quietly dried into a paste while the printer sat untouched.
This isn’t a hardware flaw so much as a side effect of how inkjet technology works: liquid ink has to stay wet inside microscopic openings, and anything that interrupts that for too long causes a clog. The good news is that the habits that prevent it are simple, mostly free, and take less effort than dealing with a dried-out cartridge after the fact. Below are seven practices that meaningfully reduce how often this happens, what to do if it’s already happened, and when it’s worth considering a different kind of printer entirely. For the wider picture on printer types, our guide to the best home printers worth buying is a useful companion read.
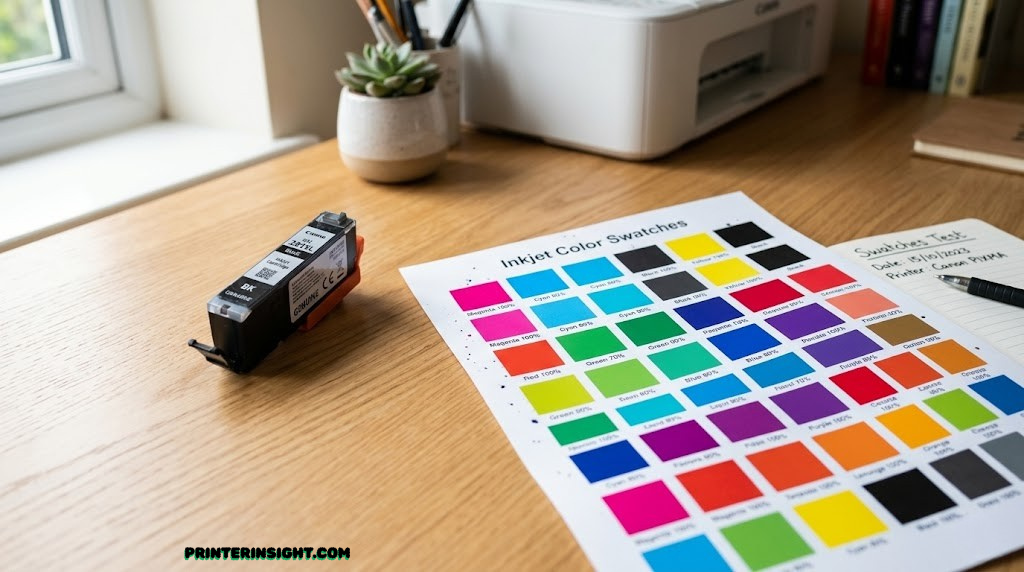
Why Inkjet Printers Dry Out in the First Place
An inkjet printer forms text and images by firing tiny droplets of liquid ink through nozzles narrower than a human hair, sometimes thousands of times per second. That precision is exactly what makes the system vulnerable: the same narrow opening that produces a crisp line of text is also small enough that a thin film of ink sitting exposed to air for too long will evaporate and leave behind a dried residue that physically blocks the nozzle.
Fig. 1 — A healthy nozzle stays wet under a thin protective layer; an exposed one evaporates and clogs
Three conditions combine to cause most drying-out problems: extended inactivity, air exposure, and environmental dryness. Any one of these alone is rarely enough to cause a real clog — a printer used outdoors in humid weather might sit for a month without trouble, while a printer in a dry, sun-heated room might clog after just a week of disuse. It’s the combination that matters, which is exactly why the steps below address all three rather than just “print more often” in isolation.
Printers that are particularly prone to this problem share a common pattern: they’re used in bursts rather than steadily. A photo printer that comes out for holiday cards once a year, a craft printer used heavily for a weekend project and then shelved, or a home-office printer that sits untouched every weekend are all higher-risk cases than a printer used lightly but consistently every few days. If that bursty pattern sounds familiar, it’s worth keeping in mind while reading the prevention steps below, since a couple of them matter more for intermittent use than for daily printers.
7 Steps to Prevent Drying-Out, at a Glance
None of these require special tools or technical skill. Most are simply a matter of building the right habit and breaking a couple of intuitive but counterproductive ones.
- 01Print something every few days, even a single test page, to keep ink moving.
- 02Power off using the printer’s own button, not the wall outlet, so it can park and cap the print head.
- 03Run a nozzle check before a full cleaning cycle to confirm a clog actually exists.
- 04Keep cartridges sealed until the moment they’re installed.
- 05Keep the printer away from heat, direct sun, and vents that dry the air around it.
- 06Maintain stable room humidity, roughly in the 40–60% range.
- 07Store spare cartridges properly rather than leaving them loose in a drawer.
If your printer mostly sits idle during the school year or only comes out for a home office that’s empty on weekends, our best printer for students and best printer for home office guides both factor intermittent-use reliability into their picks, which is worth a look if prevention alone isn’t solving a recurring problem.
Print Something Every Few Days
This is the single most effective habit on this list, and it’s also the simplest: printing regularly keeps ink physically moving through the nozzles, which prevents any single droplet from sitting exposed long enough to dry. It doesn’t need to be a meaningful print job — a single test page or even a nozzle check pattern is enough to keep things flowing.
Fig. 2 — A light, regular printing cadence keeps every nozzle in active use
For a printer that genuinely doesn’t get used often, set a recurring reminder to print one throwaway page roughly once a week. Most printer apps, including the ones covered in our best wireless printer for home guide, make this easy to do remotely from a phone, so you don’t even need to be standing at the printer to keep the habit going. For households where printing only happens during craft projects or hobby bursts, our best printer for crafting picks also factor in how well a model tolerates that exact start-stop pattern.
Why this works mechanically: ink that’s actively flowing doesn’t have time to form the thin evaporated film that eventually becomes a dried clog. Even a small print job pulls fresh ink through every nozzle in use, refreshing the seal that keeps air from reaching the ink sitting just behind it.
Power Off the Right Way
How you turn a printer off matters almost as much as how often you use it. Most inkjet printers run a brief, automatic maintenance routine the moment you press the printer’s own power button: the print head physically moves to a resting position and seals itself against a rubber capping station, which is specifically designed to keep air away from the nozzles while the printer is off.
Fig. 3 — The capping routine only runs when the printer is powered down through its own button
Cutting power at the wall, unplugging the printer, or switching off a power strip before the printer has finished its own shutdown sequence skips that capping step entirely, leaving the print head sitting exposed to room air, sometimes for days or weeks at a stretch. It’s a small, easy-to-miss habit that causes a disproportionate amount of drying-out trouble, particularly for printers on a smart plug or power strip that gets switched off automatically at night.
Do this
- Press the printer’s own power button and wait for it to fully shut down
- Leave it plugged into a standard always-on outlet
Avoid this
- Cutting power at a switched outlet or smart plug before shutdown finishes
- Unplugging the printer routinely between uses
Run a Nozzle Check Before a Full Cleaning Cycle
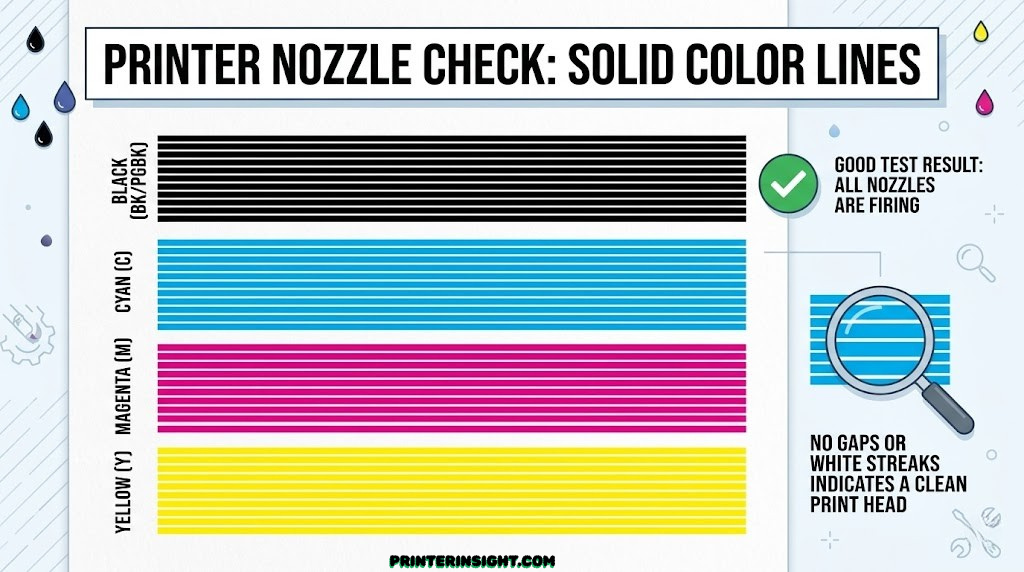
Most inkjet printers include a built-in nozzle check, usually accessible from the printer’s screen or its companion app, that prints a small test pattern of fine parallel lines in each ink color. It’s worth running this before assuming a problem needs a full cleaning cycle, since cleaning cycles consume ink to flush the system and running them unnecessarily wastes a meaningful amount of it over time.
Fig. 4 — Read the pattern before reaching for the cleaning cycle, not after
If the test page shows solid, unbroken lines in every color, the nozzles are clear and printed output should look normal — if something still looks off, the problem is more likely paper quality, print settings, or a low ink level than a clog. If you see small gaps in one or two lines, a single light cleaning cycle is usually enough to clear it. Only repeat the cleaning cycle two or three times if gaps persist, and stop to check ink levels before running it again, since a cartridge that’s simply low on ink can produce a similar-looking gap pattern to a genuine clog.
A note on overdoing it: running a deep cleaning cycle repeatedly “just in case” is one of the more common ways people accidentally waste a full cartridge’s worth of ink chasing a problem that didn’t actually need it. One nozzle check costs almost nothing; a deep clean costs real ink every time.
Keep Cartridges Sealed Until They’re Installed
New ink cartridges ship with a foil seal or plastic cap over the print contacts and nozzle area specifically to prevent the ink from drying before it’s ever used. Once that seal is removed, the clock starts — an opened cartridge left sitting on a shelf, even briefly, is exposed to the same air-drying process as a nozzle inside an idle printer.
Fig. 5 — The seal is doing real work; remove it right before installation, not before
This matters most when buying cartridges in bulk to save money, or keeping a spare on hand for a printer that’s used infrequently. Resist the urge to open a backup cartridge’s packaging ahead of time “to be ready” — leave it sealed until the exact moment the old one runs out. If you’re trying to decide between stocking individual replacement cartridges versus switching to a different ink system altogether, our home printer cheapest ink guide compares the ongoing cost of each approach.
Keep the Printer Away From Heat, Sun, and Airflow
Where a printer physically lives in your home has more effect on ink drying than most people expect. Heat speeds up evaporation, direct sunlight adds both heat and UV exposure, and sitting directly in the path of an HVAC vent or a fan creates constant airflow across the printer’s internals, all of which push moisture out of the ink faster than normal.
Fig. 6 — An interior shelf away from windows and vents keeps conditions steady around the print head
A printer placed on a desk near a south-facing window, directly under a ceiling vent, or next to a space heater in winter is fighting an uphill battle against drying, even if every other habit on this list is followed correctly. Moving it just a few feet to an interior wall or a shaded shelf often makes a real difference, and it costs nothing beyond the minor inconvenience of rearranging a desk. If footprint is the reason it’s stuck in a tight, awkward spot near a window in the first place, our best compact home printers guide rounds up smaller options that are easier to relocate to a better-protected spot.
Maintain Stable Room Humidity
Beyond avoiding direct heat sources, the general humidity level of the room a printer lives in plays a steady background role in how fast ink dries. Very dry air, common in heated homes during cold months, pulls moisture out of exposed ink faster than humid air does, which is part of why drying-out complaints tend to spike during winter heating season in many climates.
Fig. 7 — Roughly 40–60% relative humidity is a comfortable middle ground for both ink and paper
You don’t need a dedicated climate-control setup to address this — a small, inexpensive hygrometer placed near the printer is enough to confirm whether the room is actually in a reasonable range, and a basic humidifier or simply relocating the printer away from a heating vent can correct it if not. This matters most for printers kept in a garage, a converted attic office, or any room with noticeably drier air than the rest of the house.

Store Spare Cartridges the Right Way
Keeping a backup cartridge on hand is smart, but how it’s stored between purchase and installation matters more than most people assume. Cartridges should generally be stored upright with the nozzle facing down, inside a sealed, opaque container, away from direct heat or strong temperature swings, such as a hot garage or a car trunk.
Fig. 8 — A sealed container and nozzle-down orientation both reduce air contact with the ink
Beyond orientation, avoid leaving spares in a junk drawer alongside loose items that could puncture or jostle the cartridge, and try to use spares in the rough order they were purchased rather than letting an older one sit at the back indefinitely. Our full how to store printer cartridges guide goes deeper into temperature ranges and shelf-life specifics if you’re managing a larger stock of spares.

If Ink Has Already Dried, Here’s What to Try First
If you’re reading this after the fact rather than before, there’s still a reasonable chance of recovery, depending on how long the printer sat unused. Start with the cheapest, least invasive fix and only move on if it doesn’t work.
- Run the built-in cleaning cycle once, then print a nozzle check to see whether it helped before running it again.
- Repeat the cleaning cycle up to two or three times, with a nozzle check between each attempt, rather than running it repeatedly back to back.
- Remove the cartridge and inspect the contacts and nozzle plate for visible dried residue; a lint-free cloth lightly dampened with warm water or isopropyl alcohol can sometimes help dissolve light buildup on the contact area.
- Leave a stubborn cartridge soaking nozzle-down on a few layers of damp paper towel for 15 to 20 minutes, which can rehydrate light clogs enough for the next cleaning cycle to clear them.
- If none of the above works after a couple of attempts, the cartridge itself is likely beyond recovery and replacement is the practical next step.
What not to do: avoid inserting anything sharp into the nozzle opening to try to physically clear it, and don’t submerge an entire cartridge in water, since that can damage the internal electronics on cartridges with built-in chips. If you’re also dealing with a separate, permanently mounted print head rather than a cartridge-integrated one, our how to clean printer heads guide covers that specific process in more detail.
If you’re weighing whether it’s worth buying a single replacement cartridge versus comparing your printer against newer models with better drying resistance, our Canon PIXMA vs. HP Envy and Brother vs. HP printers for home comparisons are useful next reads before you decide either way.
When Prevention Isn’t Enough: Consider an Ink-Tank Printer
If you’ve followed every habit on this list and dried-out ink is still a recurring problem, the honest answer might be that a cartridge-based inkjet simply isn’t the right fit for how your household prints. That’s most often true for households that genuinely print in bursts — heavy for a week, then silent for a month — no matter how good their habits are.
Ink-tank printers, sometimes called supertank printers, use much larger internal ink reservoirs and refillable bottles instead of small sealed cartridges. They aren’t entirely immune to clogging after extreme neglect, but the larger ink volume and different internal design make them noticeably more forgiving of irregular use in practice. The Epson EcoTank ET-2800, for example, pairs that resilience with a print/scan/copy all-in-one body and a companion app for easy monitoring, and it’s worth a look specifically for households whose printing happens in unpredictable bursts rather than a steady weekly rhythm.
Before switching formats entirely, it’s worth reading our breakdown of whether ink-tank printers are worth it and our best ink-tank printer for home roundup, which compares several models beyond just the one mentioned here. If you’re choosing between the two leading ink-tank ecosystems specifically, our EcoTank vs. Smart Tank comparison is the natural next stop, and if wireless reliability matters as much as drying resistance, our best wireless printer for home guide can help narrow the field further.

Inkjet vs. Ink-Tank vs. Laser: Which Avoids This Problem Entirely?
It’s worth zooming out beyond prevention habits to the underlying technology question, since the three main home printer types handle idle time very differently.
| Type | Drying-out risk | Best suited to |
|---|---|---|
| Cartridge inkjet | Highest — small sealed reservoirs, needs regular use | Frequent, steady printing; best photo quality |
| Ink-tank / supertank | Lower — large reservoirs are more forgiving | Bursty or irregular printing habits, high volume |
| Laser (toner) | Essentially none — dry powder, not liquid ink | Infrequent or unpredictable use, mostly text |
Laser printers sidestep this entire problem because toner is a dry powder rather than a liquid, so there’s nothing to evaporate or clog in the first place. If most of what you print is black-and-white text and your printer regularly sits untouched for weeks, our best laser printer for home guide and our broader inkjet vs. laser printer for home comparison are worth reading before buying another inkjet and repeating this cycle. For households specifically loyal to the Brother lineup, our best Brother printer for home picks include several laser options built around exactly this kind of reliability, and our best HP printer for home use guide covers HP’s parallel lineup for comparison.
The honest tradeoff is that laser printers don’t do color photos well, and ink-tank printers cost more upfront than a basic cartridge inkjet. There’s no single “best” answer here independent of how your household actually prints — only a better match for your specific pattern of use, which is really what this entire guide has been circling around from the start. If cost is the deciding factor either way, our cost of printer ink vs. toner breakdown puts real numbers behind the comparison, and Mac-based households should double check compatibility through our best home printer for Mac guide regardless of which type they land on.
Frequently Asked Questions
A handful of questions come up constantly around this exact problem, separate from the step-by-step prevention habits above.
How often do I need to print to keep an inkjet printer from drying out?
Printing something at least once every few days, even a single test page, is generally enough to keep ink moving through the nozzles and prevent it from sitting still long enough to dry. Going two or more weeks without any print job is when most ink-drying problems begin.
Why did my ink dry out even though I print regularly?
Regular printing helps, but it doesn’t fully protect against other causes, like unplugging the printer from the wall instead of powering it off with its own button, storing it somewhere hot or in direct sunlight, or leaving a cartridge out of its packaging before installing it. Drying out is usually the result of one specific habit rather than printing frequency alone.
Can dried ink in a printer be fixed, or is the cartridge ruined?
Mild clogs from a few days of inactivity often clear up with the printer’s built-in cleaning cycle, run once or twice with a nozzle check in between. Severe drying after weeks or months of disuse is harder to reverse and sometimes does mean the cartridge needs to be replaced, particularly if the print head itself is permanently clogged rather than just the cartridge.
Should I leave my printer plugged in all the time?
Yes, leaving it plugged into a standard always-on outlet is generally better than unplugging it after every use. Most inkjet printers run a brief maintenance routine when powered off normally that parks and caps the print head to protect it from air exposure, and that routine can’t happen if the printer is cut off from power entirely.
Does turning off a printer overnight cause it to dry out faster?
No, turning a printer off normally using its own power button is fine and is exactly how the printer is designed to be used between sessions. The capping mechanism that protects the print head from drying activates specifically when the printer is powered down properly, not left running continuously.
Is it bad to remove ink cartridges between print jobs?
Yes, repeatedly removing and reinserting cartridges exposes the nozzles to open air more often than necessary and can introduce dust or debris into the print head area. Cartridges are designed to stay installed in the printer between uses, with the printer’s own capping system protecting them rather than removal.
What humidity level is best for an inkjet printer?
A relative humidity range of roughly 40 to 60 percent is generally considered ideal for inkjet printers, similar to the comfort range for most home electronics. Air that’s too dry speeds up ink evaporation at the nozzles, while air that’s too humid can affect paper feeding and printed output quality.
Can I use rubbing alcohol or water to unclog a dried print head?
A small amount of isopropyl alcohol or warm water on a lint-free cloth can sometimes help dissolve light dried ink on an exposed print head contact area, but it should be used sparingly and never poured directly into the cartridge or printer. For anything beyond a light clog, the printer’s built-in cleaning cycle or manufacturer guidance is the safer first step.
Do all inkjet printers dry out, or just certain brands?
Drying out is a characteristic of inkjet technology generally, since all inkjet printers rely on liquid ink staying fluid inside small nozzles, rather than a flaw specific to one brand. Some models include more aggressive automatic maintenance routines than others, which can reduce how often the problem shows up, but no inkjet is fully immune.
How long can an inkjet printer sit unused before ink dries out?
Light clogging can begin after as little as one to two weeks of complete inactivity, while a month or more of disuse significantly raises the chance of a clog that needs more than a single cleaning cycle to clear. The exact timeline varies by printer, cartridge type, and the surrounding environment, particularly heat and humidity.
Will a printer’s automatic cleaning cycle use up too much ink?
Cleaning cycles do consume some ink to flush the nozzles, and running them excessively can noticeably shorten a cartridge’s lifespan. That’s why it’s worth running a simple nozzle check first, as covered in Step 3 above, to confirm a clog actually exists before reaching for a full cleaning cycle.
Is switching to an ink-tank printer actually a permanent fix for drying out?
Ink-tank printers can still experience print head clogging if left unused for very long stretches, so they aren’t completely immune, but the much larger ink reservoirs and different print head designs on many models make the problem noticeably less common in practice. It’s a meaningful improvement for chronic cases, not an absolute guarantee.
The Short Version
Keeping an inkjet printer from drying out really comes down to three ideas repeated across all seven steps: keep ink moving with light, regular use; keep air away from exposed ink through proper shutdown and sealed storage; and keep the surrounding environment stable rather than hot, sunny, or bone-dry. None of it requires special equipment, and most of it costs nothing beyond a slightly more deliberate habit than just walking away from the printer after each use.
If you’ve tried all of this and dried-out ink is still a recurring fight, that’s useful information in itself — it’s a sign your household’s printing pattern might genuinely be a better match for an ink-tank or laser printer than for a standard cartridge inkjet, and there’s no shame in matching the tool to the actual habit rather than forcing the habit to match the tool.
Shop Ink-Tank Printers on Amazon