How to Connect a Printer to Wi-Fi (Step-by-Step for Any Home Printer)
Whether your printer has its own screen and buttons, relies on a phone app, or supports one-touch WPS setup, here is exactly how to get it talking to your home Wi-Fi network — plus how to add it on Windows, Mac, iPhone, Android, and Chromebook.
Why This Guide
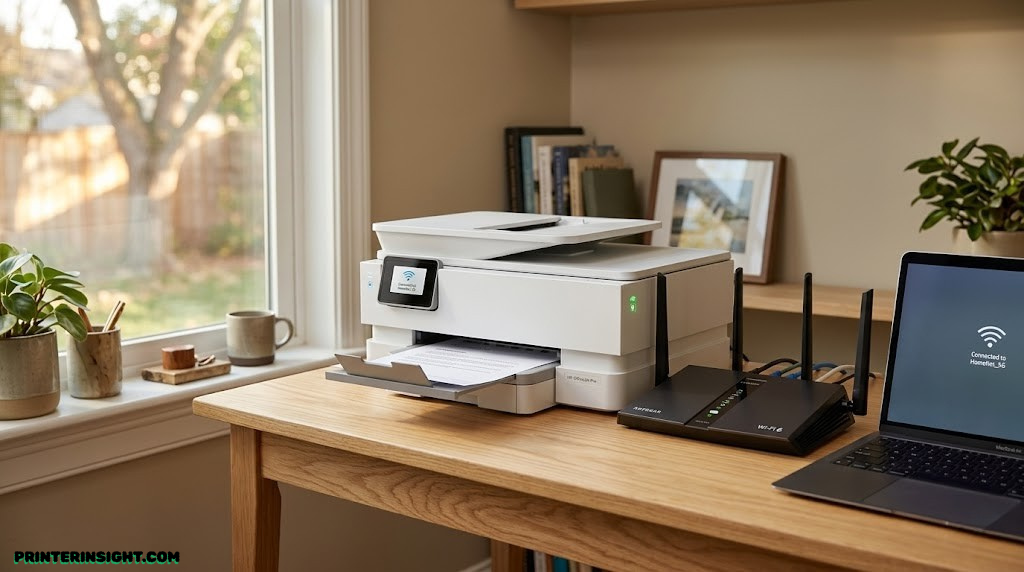
Connecting a printer to Wi-Fi sounds like it should be instant, and most of the time it is. But printers vary enough between brands, and home networks vary enough between routers, that “just connect it” sometimes turns into twenty minutes of frustration. The good news is that nearly every home printer made in the last several years uses one of three setup paths: a built-in control panel with its own wireless menu, a companion phone app that walks you through the same process with friendlier prompts, or a WPS button that handles everything with a single press on your router.
This guide covers all three paths in full, step by step, with diagrams for each stage so you can see exactly what should be happening on your printer’s screen or your phone at each point. We also cover how to add your connected printer on every major operating system — Windows 10, Windows 11, macOS, iOS, Android, and Chromebook — so you can print from any device in the house the moment setup finishes. If you are setting up a brand-new printer rather than reconnecting an existing one, our roundup of the best home printers is a good place to start before you even open the box.
What You’ll Need First
A successful Wi-Fi setup almost always comes down to having the right information on hand before you start pressing buttons. Gather these four things first, and the rest of this guide will go quickly:
- Your printer, powered on and within a few feet of your router for the initial setup
- Your Wi-Fi network name, also called the SSID, exactly as it appears in your phone’s Wi-Fi list
- Your Wi-Fi password, which is case-sensitive on virtually every printer and router
- A computer or smartphone to either run the setup wizard from or install the manufacturer’s app on
One detail trips people up more than anything else: many home routers broadcast two separate networks, one ending in something like “-5G” and a plain version without it. Most printers can only join the 2.4 GHz network, not the faster 5 GHz one, so if your printer’s network list does not show your usual network name, look for the version without “5G” in it.
Where to find your Wi-Fi password
If you do not know your Wi-Fi password, check the label on the bottom or back of your router — it is usually printed there as “Network Key,” “Wireless Password,” or “WPA2 Key.” If the password has been changed since setup, log in to your router’s admin panel (usually by typing 192.168.1.1 or 192.168.0.1 in a browser) and look under the Wireless or Wi-Fi settings section.
Three Ways to Connect a Printer to Wi-Fi
Every method below leads to the same result, so pick whichever matches what your printer offers and what you find easier.
| Method | Best For | What You Need | Typical Time |
|---|---|---|---|
| Method 1: Control Panel | Printers with a screen and navigation buttons or touchscreen | Wi-Fi name and password typed on the printer | 2–4 minutes |
| Method 2: Manufacturer’s App | Printers with tiny or no screen, or anyone who prefers guided setup | A smartphone with the brand’s app installed | 3–6 minutes |
| Method 3: WPS Button | Printers that have a WPS button and routers that support WPS | Physical access to the router and the printer’s WPS button | Under 2 minutes |
If your printer’s display is large enough to show a menu and a few words at a time, Method 1 usually takes under three minutes. If your printer has only a small status light or a single-line display, the app-based Method 2 will be considerably less fiddly. And if both your printer and your router have a WPS button, Method 3 is by far the fastest option and requires no password entry at all. If you are still deciding which printer to buy in the first place and a smooth wireless setup matters to you, our best wireless printer for home guide ranks models specifically on how painless this process is.
Connect Using the Printer’s Control Panel
This is the most direct route if your printer has its own screen and a dedicated wireless setup wizard. You will type your network name and password once, directly on the printer, and it stays connected from then on.
Locate the Wireless Button or Wi-Fi Icon
Look at the printer’s control panel for a button marked with a Wi-Fi icon, often shown as a dot with curved signal lines above it. On touchscreen models, the same icon appears as a menu tile instead of a physical button.
Open the Wireless Setup Wizard
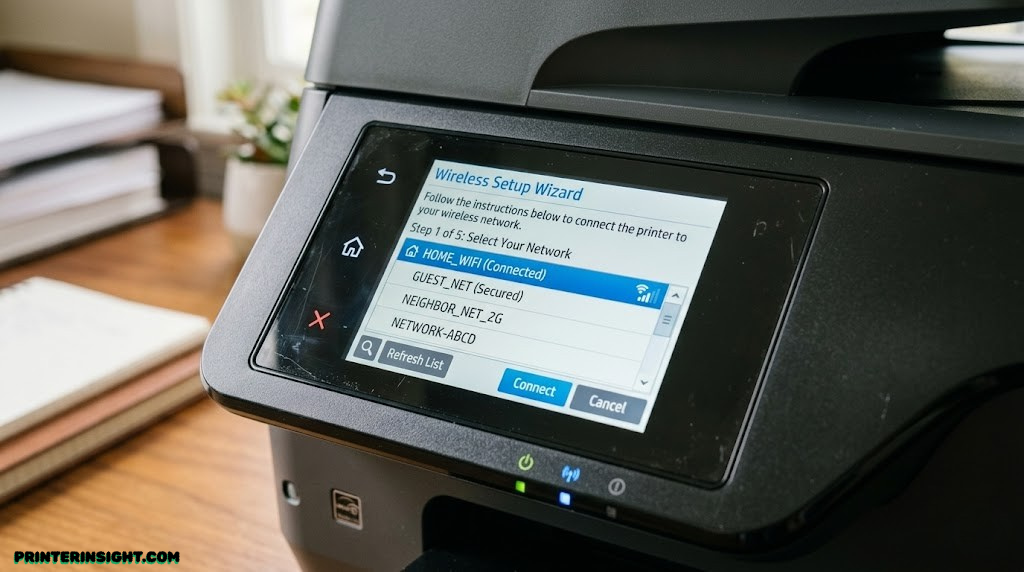
Press the wireless button or tap the network icon to open the setup menu. Inside, look for an option called “Wireless Setup Wizard,” “Network Setup,” or simply “Wi-Fi Setup,” and select it to begin scanning for networks.
Select Your Home Network from the List
The printer scans nearby signals and displays a list of network names. Find your network’s SSID and select it. Remember to choose the 2.4 GHz version if your router broadcasts a separate 5 GHz network alongside it.
Enter Your Wi-Fi Password
Use the on-screen keypad or touchscreen keyboard to type your network password exactly as it appears, including capitalization. Confirm to send the password to the printer.
Wait for the Wireless Light to Turn Solid
The printer takes a few moments to join the network. The Wi-Fi icon or status light usually blinks while connecting, then switches to a steady, solid light once the connection succeeds.
Print a Network Configuration Page to Confirm
From the same wireless menu, choose “Print Network Report” or “Print Configuration Page.” The printout shows the network name it joined and its assigned IP address, which confirms the connection succeeded.
Connect Using the Manufacturer’s App
If your printer has a tiny display or none at all, the manufacturer’s app does almost all of the work for you. HP Smart, Epson Smart Panel, Canon PRINT, and Brother Mobile Connect all follow roughly the same flow.
Download the App for Your Printer Brand
Search your phone’s app store for the app matching your printer’s brand, then open it and create or sign into an account if prompted.
Power On the Printer and Start Wireless Setup Mode
Open the app and tap “Add Printer” or “Set Up a New Printer.” The app prompts the printer to broadcast a short-range, temporary signal called Wi-Fi Direct, separate from your home network.
Let Your Phone Find and Link to the Printer
The app searches for nearby printers broadcasting that temporary signal. Tap your printer’s name when it appears in the app’s list to create a short-lived link between your phone and the printer.
Enter Your Home Network Name and Password in the App
Once linked, the app asks for your home Wi-Fi name and password and shows a simple form to fill in, no printer keypad required.
Printer Switches to Your Home Network
The app hands the password to the printer, the temporary direct link disconnects, and the printer joins your actual home Wi-Fi network alongside your phone and other devices.
The app typically finishes by offering to print a test page automatically, and from that point on, the printer reconnects to the same network on its own every time it powers on.
Connect Using the WPS Button (Fastest Method)
WPS stands for Wi-Fi Protected Setup, and it is the fastest way to connect a printer to your home network because it completely skips the step where you type your Wi-Fi password. Instead, you press a button on your router and a button on your printer within a two-minute window, and the two devices negotiate the connection automatically.
Before you try WPS
Not every printer or router supports WPS. Check your printer’s manual or the manufacturer’s website to confirm it has WPS capability. On the router side, look for a button labelled “WPS” on the back or side of the unit. Some internet service providers disable WPS for security reasons, in which case you will need Method 1 or Method 2 instead.
Put the Printer into WPS Mode
On most printers, press and hold the Wireless or Wi-Fi button until the wireless light begins to blink, usually between two and five seconds. Some printers have a dedicated WPS button labelled exactly that. Refer to your printer’s quick-start guide if you are unsure which button to press — the manual will call out WPS setup explicitly if the feature is supported.
Press the WPS Button on Your Router Within Two Minutes
Immediately after activating WPS mode on the printer, walk to your router and press its WPS button. The WPS light on the router will typically blink to indicate it is searching for a device to pair with. You need to complete this step within two minutes of starting WPS mode on the printer, as the window closes automatically after that for security reasons.
Wait for Both Devices to Confirm the Connection
The printer and router exchange credentials automatically. On the printer, the wireless light stops blinking and turns solid when the pairing succeeds. On most routers, the WPS light also turns solid before switching off. The entire exchange usually takes under thirty seconds once both buttons have been pressed.
Confirm the Connection and Print a Test Page
Print a network configuration page from the printer’s settings menu to confirm it joined the correct network and received an IP address. Everything from this point is the same as after Methods 1 and 2 — the printer will reconnect automatically every time it powers on.
WPS is convenient but has known security limitations compared to manually entering a long, complex password. If your network handles sensitive data or is shared among many users, the manual methods above give you more control over which devices can join.

Browse current wireless-friendly home printers with the most painless setup experiences.
See Options on AmazonHow to Confirm Your Printer Is Actually Connected
Before you try printing from across the house, it helps to confirm the connection from the printer’s side rather than just assuming it worked.
- The Wi-Fi icon or status light on the printer is solid, not blinking
- A printed network configuration page shows your network name and a valid IP address, usually starting with 192.168 or 10.0
- The manufacturer’s app shows the printer as “Online” or “Ready” rather than “Offline” or “Not Found”
- The printer appears in your computer’s list of available printers when you go to add one
If all four of those check out, you are genuinely connected, and the printer should now show up automatically on any device joined to the same Wi-Fi network without repeating the setup process.
How to Find Your Printer’s IP Address
Your printer’s IP address is the unique number that identifies it on your home network. You may need it to access the printer’s built-in web page, assign it a static address, or diagnose connection problems. There are three reliable ways to find it.
From the Printer’s Control Panel
The fastest method is to navigate to Settings > Network or Wireless > Network Information on the printer’s screen. The IP address is listed there alongside the network name. On HP printers specifically, tapping the wireless signal icon on the home screen usually shows network details immediately without navigating through menus.
By Printing a Network Configuration Page
If you printed the configuration page in Step 6 of Method 1, the IP address is already on that page. If you need to print it again, go to the printer’s Settings or Tools menu and look for “Print Network Summary” or “Wireless Test Report.” Every brand has a slightly different label for this function, but it is available on virtually all wireless printers.
From Your Router’s Admin Panel
Log in to your router’s administration page by typing its IP address into a browser — usually 192.168.1.1, 192.168.0.1, or 10.0.0.1. Look for a section called “Connected Devices,” “DHCP Clients,” or “LAN.” Your printer will be listed there by its manufacturer name alongside the IP address the router assigned to it.
What is the embedded web server (EWS)?
Every networked printer has a small built-in website called the Embedded Web Server or EWS. You can open it by typing the printer’s IP address directly into a browser. It shows ink or toner levels, lets you change network settings without touching the printer, and often reveals diagnostic information that is not visible on the printer’s own screen. It is one of the most useful and least-known features of modern printers.
Adding a Wi-Fi Printer to Each Type of Device
Once the printer is on your home network, any device on that same network can use it — but each operating system has a slightly different process for adding it to the device’s printer list. Here is the exact path for each.
Windows 10 & 11
- Open Settings (Win + I)
- Go to Bluetooth & devices > Printers & scanners
- Click Add device
- Windows scans the network and lists available printers
- Click your printer’s name, then Add device
- Windows installs the driver automatically if connected to the internet
macOS (Ventura and later)
- Open System Settings (Apple menu)
- Go to Printers & Scanners
- Click the + button to add a printer
- Your printer appears in the list if it is on the same network
- Select it and click Add
- macOS downloads the driver via Software Update if needed
Chromebook
- Open Settings > Advanced
- Click Printing > Printers
- Click Add printer
- ChromeOS scans and lists nearby printers
- Select your printer and click Add
- Alternatively, use Save to Google Drive for cloud printing
Printing from iPhone or iPad (AirPrint)
Apple devices use a technology called AirPrint, which requires no driver installation at all. If your printer supports AirPrint — and most printers made after 2014 do — it will appear automatically in the printer selection menu whenever you tap the Share button and choose Print from any app. The printer must be on the same Wi-Fi network as your iPhone or iPad for AirPrint to work. You do not need to add the printer anywhere in Settings first; it simply appears when you go to print.
If your printer does not support AirPrint, install the manufacturer’s app instead. HP Smart, Epson Smart Panel, Canon PRINT, and Brother Mobile Connect all include a printing function that works even on non-AirPrint printers.
Printing from an Android Phone or Tablet
Android handles printing through print services, which are small plug-ins that work in the background. Most Android phones come with a built-in print service called Default Print Service that automatically discovers printers on your network using Mopria, an industry standard for wireless printing. To check if it is enabled, go to Settings > Connected Devices > Connection Preferences > Printing and make sure Default Print Service is turned on.
If your printer is not discovered automatically, install the manufacturer’s app — HP Smart, Epson Smart Panel, Canon PRINT, or Brother Mobile Connect — which adds its own print service to Android. After installing the app, return to Settings > Printing and you should see the new service listed alongside the default one. Turn it on, and your printer will appear when you choose Print from any app.
Printing from a Work Laptop on Your Home Network
Work laptops managed by an employer often have restricted printer access — IT policies may prevent installing drivers from non-company sources. In this case, the simplest workaround is to use the manufacturer’s browser-based printing option if one exists, or to access the printer through Google Chrome’s built-in print-to-local destination feature. If your employer uses a print management system, you may need to contact IT to add the printer to your allowed devices list rather than trying to install it yourself.
Brand-Specific Setup Notes
The overall flow is nearly identical across brands, but a few small differences are worth knowing ahead of time.
HP printers rely on the HP Smart app for nearly everything, including some setups that activate HP+ features and require an HP account and an internet connection during setup, even though the printer itself only needs your home network. If you are deciding between HP models in general, our best HP printer for home use guide is a useful companion.
Epson printers use the Epson Smart Panel app and tend to have one of the more straightforward control-panel wizards of any brand, with plain-language menu names. If you are comparing Epson against HP’s ink tank lineup specifically, see our Epson EcoTank vs. HP Smart Tank breakdown.
Canon printers use the Canon PRINT app and, on many models, support an additional one-tap setup over NFC for compatible Android phones, which skips the password-typing step entirely. Our Canon PIXMA vs. HP Envy comparison is a good next read if you are weighing those two brands.
Brother printers use the Brother Mobile Connect app and, on fax-capable models, ask you to confirm the wireless connection separately from any phone-line setup so the two do not get confused during installation. See our Brother vs. HP printers for home guide or our dedicated best Brother printer for home picks if you are still choosing between the two.
| Brand | App Name | WPS Support | NFC Setup | Account Required |
|---|---|---|---|---|
| HP | HP Smart | Most models | No | Optional (required for HP+) |
| Epson | Epson Smart Panel | Yes | No | No |
| Canon | Canon PRINT | Yes | Select models (Android) | No |
| Brother | Brother Mobile Connect | Yes | No | No |
Troubleshooting Common Connection Problems
If the printer refuses to join the network, the cause is almost always one of the following, roughly in order of how often each one turns out to be the culprit.
| Symptom | Likely Cause | Fix |
|---|---|---|
| Network name does not appear in the list | Printer can only see 2.4 GHz, router is showing 5 GHz only | Look for or enable a 2.4 GHz network name on the router |
| “Incorrect password” even though it looks right | Password is case-sensitive, or contains a similar-looking character | Retype carefully, double-checking capital letters and symbols |
| Connects, then drops a few minutes later | Printer is too far from the router, weak signal | Move the printer closer or add a Wi-Fi extender |
| App cannot find the printer at all | Phone is on a different network than expected, often a 5 GHz-only band | Confirm the phone is on the same 2.4 GHz network during setup |
| Worked before, stopped suddenly | Router was reset, password changed, or firmware updated | Repeat the setup steps with the current network details |
| WPS pairing fails or times out | WPS window expired or router has WPS disabled by ISP | Try again faster, or use Method 1 or 2 instead |
| Printer connects but shows wrong IP or 169.x.x.x address | DHCP failure — printer could not get an address from the router | Restart both the printer and router, then reconnect |
| Printer drops connection after sleeping | Sleep mode cuts wireless radio to save power | Disable sleep mode in printer settings, or set a longer sleep delay |
If none of those match your situation, a simple power cycle resolves a surprising number of stubborn cases: turn the printer off, unplug the router for thirty seconds, plug it back in, wait for it to fully restart, then power the printer back on and try the setup process again from the beginning.
Printer Drops Connection After Waking from Sleep
This is one of the more frustrating patterns that does not fit neatly into a single error message. What happens is that the printer’s wireless radio goes into a low-power state when the printer sleeps to save electricity, and when it wakes up it sometimes fails to re-establish the network connection cleanly. The computer or phone then reports the printer as offline even though it is physically on and shows no error on its own screen.
The fix depends on the severity. If it happens occasionally, power-cycling the printer (turning it off and back on) re-establishes the connection. If it happens every time the printer wakes, go into the printer’s energy or power settings and either turn sleep mode off entirely or extend the sleep timer to a longer interval like 30 or 60 minutes. Some printers also have a specific “Wake on LAN” or “Remain Connected After Sleep” setting that prevents this entirely.
VPN Conflicts with Home Printer Connections
If you use a VPN on your computer — which is common for remote workers — your printer may appear offline or unreachable even though it is connected to the same Wi-Fi network. This happens because most VPN software routes all network traffic through the VPN tunnel, which puts your computer on a different logical network than your printer even though both are physically on your home Wi-Fi.
The solution is to configure your VPN to use split tunneling, a setting that routes internet traffic through the VPN but lets local network traffic (like printer communication) go directly through your home network. Most major VPN clients support split tunneling, though the setting’s exact name and location varies. Alternatively, temporarily disconnecting from the VPN before sending a print job will always work, though it is less convenient.
Printer Connects to Guest Network Instead of Main Network
If your router has a guest network enabled, a printer placed near the router might accidentally pick it up during setup, especially if the guest network name is similar to your main network name. Guest networks are intentionally isolated from other devices on the main network, which means computers and phones on the main network cannot see a printer on the guest network even though all devices are connected to the same router.
If this happens, run the wireless setup wizard again and make sure to select your main network, not the guest network. If you want to keep the printer intentionally on a separate network for security reasons, you would need to connect your computers to the same guest network when printing, which is generally not practical for everyday use.
Fixing “Printer Offline” Errors
The “Printer Offline” message is one of the most common complaints about wireless printing, and it is frustrating because it is vague — it can mean the printer has actually lost its network connection, or it can be a stale status in the operating system that does not reflect the printer’s real state.
Step 1: Confirm the printer is actually on the network
Check the wireless light on the printer. If it is solid, the printer is connected and the offline message is a software problem. If it is blinking or off, the printer genuinely has lost its network connection and you need to go through the wireless setup steps again.
Step 2: Clear the print queue
On Windows, open Control Panel > Devices and Printers, right-click your printer, and select “See what’s printing.” Cancel any stuck jobs in the queue. A stalled print job can lock the printer in an error state that displays as offline.
Step 3: Set the printer as default and check its status
On Windows, right-click the printer in Devices and Printers and make sure “Use Printer Offline” is not checked — if it is, uncheck it. Also confirm that “Set as Default Printer” is selected so Windows sends jobs to the right printer. On macOS, go to System Settings > Printers & Scanners, select the printer, and click “Resume” if printing is paused.
Step 4: Remove and re-add the printer
If the above steps do not fix it, remove the printer entirely from your device’s printer list and add it again. On Windows, go to Settings > Bluetooth & devices > Printers & scanners, select the printer, and click Remove. Then add it again using the steps in the Adding the Printer to Each Device section above. This forces the operating system to rediscover the printer fresh and clears any stale connection state.
Step 5: Restart the print spooler service (Windows)
On Windows, search for “Services” in the Start menu, find “Print Spooler” in the list, right-click it, and select Restart. The print spooler is the background service that manages print jobs, and restarting it resolves many persistent offline errors without requiring a full computer restart.
What to Do When You Get a New Router or Change Your Password
A printer that was working perfectly will suddenly act broken the moment you switch internet providers, replace your router, or update your Wi-Fi password for security reasons. This is not a printer malfunction; the printer is still looking for a network that, from its point of view, no longer exists.
The fix is simply to repeat whichever method you used the first time, Method 1, Method 2, or Method 3 above, entering the new network name and password. Most printers do not automatically detect that a network has changed, so there is no shortcut here, but the process itself takes just as little time as it did originally.
How to Forget the Old Network First
On many printers, you need to clear the saved wireless settings before re-connecting to a new network, especially if the printer was on the old router’s network for a long time. To do this, go to the printer’s Settings > Network or Wireless menu and look for “Restore Network Settings,” “Reset Wi-Fi,” or “Clear Wireless Settings.” This wipes the old credentials so the setup wizard can start fresh without the printer trying to fall back to the defunct previous network.
After resetting the network settings, the printer’s wireless light will blink or turn off, which is normal. From there, simply follow Method 1, 2, or 3 from the beginning using the new router’s network name and password.
Static IP vs. DHCP: Should You Assign Your Printer a Fixed Address?
By default, your router assigns your printer an IP address automatically using a system called DHCP (Dynamic Host Configuration Protocol). This works perfectly well for most households, but the IP address the router assigns can occasionally change — typically when the router restarts or the printer has been off for an extended period — which can cause the printer to temporarily disappear from connected devices before everything resynchronizes.
When to stick with DHCP
For the vast majority of home users, DHCP works without any problems. The router remembers which device was assigned which address and typically hands out the same one each time. If you have never experienced a situation where your printer stopped being discovered by your devices after a router restart, there is no reason to change anything.
When to assign a static IP address
A static IP is worth considering if you frequently access the printer’s embedded web server directly by typing its IP address in a browser, or if you add the printer to devices by specifying its IP address rather than letting the operating system discover it. In these cases, the IP address changing becomes a real inconvenience rather than a theoretical one.
How to assign a static IP address
The cleanest way to give your printer a fixed address is through your router’s admin panel rather than through the printer itself. This is called a DHCP reservation or address reservation. Log in to your router at 192.168.1.1 or your router’s equivalent address, find the DHCP reservation section, and add an entry that maps your printer’s MAC address (shown on the network configuration page) to a specific IP address. The router then always assigns that same address to your printer, which avoids the printer having to maintain a static configuration on its own. Your printer’s MAC address is printed on the network configuration page or listed in the printer’s wireless settings menu.
Wi-Fi Security and Your Printer
A printer on your home Wi-Fi network has the same level of network access as any other connected device — which means its security matters more than most people realize. Modern wireless printers hold stored Wi-Fi credentials, may cache recently printed documents, and have web-accessible administration panels that, if left unsecured, could expose information to anyone else on the network.
WPA2 vs. WPA3: Which should your network use?
WPA3 is the newer and more secure Wi-Fi security standard, but most home printers manufactured before 2022 only support WPA2. If your router is set to WPA3-only mode, older printers may fail to connect. The safest and most compatible configuration for most households is a router set to WPA2/WPA3 mixed mode, which allows newer devices to use WPA3 while still accepting WPA2 connections from older hardware like printers and smart home devices.
Change your printer’s embedded web server password
Most printers ship with no password on their embedded web server, meaning anyone on your home network can open a browser, type the printer’s IP address, and access its settings. While this is a low risk on a typical home network with trusted household members, it is worth setting a password if you have frequent guests or maintain a shared network with people you do not fully trust. The password setting is usually found at the printer’s web interface under Settings > Security > Administrator Password.
Keep the printer’s firmware updated
Printer manufacturers periodically release firmware updates that patch security vulnerabilities in addition to fixing bugs and adding features. Most modern printers can check for and install firmware updates directly from their settings menu without requiring a computer. On HP printers, this is under Settings > Printer Maintenance > Update the Printer. On Epson, it is under Settings > Firmware Update. Enable automatic firmware updates if the option is available so you do not have to remember to do this manually.
Cloud Printing and Printing from Outside Your Home
Standard Wi-Fi printing only works when your device is on the same home network as the printer. If you want to send a print job from a coffee shop, a hotel room, or your workplace, you need one of the cloud printing options below.
HP ePrint
HP printers with an active internet connection are assigned a unique email address by HP. You can send a print job to any HP printer from anywhere in the world simply by emailing the file to that address. The printer receives the job over the internet and prints it automatically. You can find your printer’s ePrint address in the HP Smart app under printer information, or by printing an information page from the printer’s settings menu.
Epson Connect
Epson’s equivalent remote printing service is called Epson Connect. After registering your printer at epsonconnect.com, it receives an email address similar to HP ePrint. Epson Connect also includes a feature called Scan to Cloud, which lets you scan documents directly to cloud storage services like Google Drive and Dropbox from the printer’s control panel without needing a connected computer.
Canon Cloud Link
Canon’s cloud printing service, called Canon Cloud Link or MAXIFY Cloud Link depending on the printer series, integrates with Google Drive, Dropbox, Evernote, and other cloud storage services directly from the printer’s touchscreen. You can print documents stored in the cloud without using a computer at all, and scan directly to cloud folders.
Mopria Print Service
Mopria is an industry standard supported by most major printer manufacturers. If your printer carries the Mopria-certified logo, it can be discovered and used by Android devices and many smart TVs without installing any brand-specific software. Mopria printing requires the printer and the device to be on the same network, so it does not enable remote printing from outside the home, but it does eliminate the need for brand-specific apps on Android.
Print to PDF and email as an alternative
If you need someone at home to print something while you are away and none of the above cloud services apply to your printer, the simplest alternative is to send the file by email or messaging app to someone at home and have them print it. Most documents can also be sent to a nearby print shop, library, or office supply store where you can pick up the printout without involving your home printer at all.
Keeping Your Printer Running Smoothly After Setup
Once the connection itself is sorted out, a handful of ongoing habits keep a home printer reliable for years rather than becoming a recurring source of frustration. Ink and toner are usually the bigger long-term cost than the printer itself, so it is worth understanding the difference between the two before you are stuck buying either; our cost of printer ink vs. toner comparison lays that out clearly.
If your printer is an inkjet model and goes weeks without being used, the print head nozzles can dry out and cause streaky or missing colors the next time you need it. Our guide on how to prevent an inkjet printer from drying out covers simple habits that avoid this entirely. If streaking or banding has already shown up, our walkthrough on how to clean printer heads covers the built-in cleaning utility most printers include.
If you keep spare ink cartridges on hand, especially for a printer you do not use daily, storing them properly matters more than people expect; see our guide on how to store printer cartridges for the details. And for the rest of the small habits that add years to a home printer’s life, our broader home printer maintenance tips guide rounds everything up in one place.
Still Won’t Connect? It Might Be Time to Consider a New Printer
Older printers, particularly ones made before reliable dual-band Wi-Fi became standard, sometimes struggle with modern routers no matter how carefully you follow the steps above. If you have worked through this entire guide more than once and the connection still will not stick, that is a reasonable signal that the printer’s wireless hardware itself may be the limiting factor rather than anything you are doing wrong. If you are at that point, here is where to start looking:
General Buying Guides
And if you are not yet sure which category of printer makes sense for your household at all, our inkjet vs. laser printer for home comparison and our breakdown of whether ink tank printers are worth it are good starting points before you spend any money.
FAQs About Connecting a Printer to Wi-Fi
Why won’t my printer show up in the list of available networks?
This almost always means the printer can only see the 2.4 GHz band and your phone or router is showing a 5 GHz-only network name. Look for a separate network name without “5G” in it, or check your router settings to confirm 2.4 GHz broadcasting is enabled.
Do I need to be near the router to set up the printer?
Yes, for the initial setup it helps to have the printer within a few feet of the router so the signal is strong and reliable. Once connected, you can move the printer anywhere within your home’s normal Wi-Fi range.
Can I connect a printer to Wi-Fi without a smartphone?
Yes. Any printer with its own screen and wireless setup wizard, covered in Method 1 above, can be connected entirely from the printer’s control panel without ever touching a phone or app. The WPS button method (Method 3) also requires no smartphone.
What is Wi-Fi Direct, and is it the same as connecting to my home network?
No. Wi-Fi Direct is a temporary, short-range connection used only during setup so your phone and printer can talk to each other before the printer joins your actual home network. After setup finishes, the printer disconnects from Wi-Fi Direct and joins your normal Wi-Fi instead.
Why did my printer disconnect after I got a new router?
A new router has a different name and password than the one the printer originally connected to, even if you kept the same internet provider. You will need to repeat the wireless setup steps with the new network’s details. Clear the printer’s stored network settings first if it keeps trying to connect to the old network.
My password is correct, but the printer still won’t connect. What else could it be?
Double-check for similar-looking characters such as a capital “O” versus a zero, or a lowercase “l” versus a capital “I.” If the password is confirmed correct, try moving the printer closer to the router or restarting both devices. Also confirm your router is not set to WPA3-only mode, as older printers require WPA2 compatibility.
Does connecting to Wi-Fi let me print from any device in the house?
Yes. Once the printer joins your home network, any computer, phone, or tablet connected to that same network can typically find and print to it without any additional setup.
Can two different printer brands be on the same Wi-Fi network at once?
Yes, there is no limit to how many printers, regardless of brand, can be connected to the same home network at the same time.
Why does the app ask me to create an account just to connect to Wi-Fi?
Some manufacturers, particularly HP with its HP+ program, tie certain features to an account and an internet connection during setup. The account is not strictly required for basic Wi-Fi connectivity on most models, though some setup flows make it the default path.
How do I know if my printer is on 2.4 GHz or 5 GHz Wi-Fi?
Check the network configuration page you printed in Method 1, Step 6, or look in the manufacturer’s app under network details. Most consumer printers only support 2.4 GHz, so if your printer connected at all, it is very likely on that band.
Can I switch my printer from USB to Wi-Fi later?
Yes. You can run either method in this guide at any time, even on a printer that has been connected by USB for years, and it will start working wirelessly without affecting the USB connection if you still want to keep it.
Will moving my printer to a different room break the connection?
Not as long as the new location is still within range of your home Wi-Fi network. If the signal is weak in the new spot, printing may become slow or unreliable, but the printer typically stays connected rather than dropping off entirely.
What does the WPS button on my router do?
WPS (Wi-Fi Protected Setup) is a shortcut that lets compatible devices join your network with a button press instead of entering the Wi-Fi password. You press the WPS button on your router and on your printer within two minutes of each other, and the two devices exchange credentials automatically. See Method 3 above for the full steps.
Why does my printer keep going offline when it’s been idle?
Most printers enter a sleep mode after a period of inactivity and sometimes fail to reconnect to the network cleanly when they wake up. You can usually fix this by extending the sleep timer or disabling sleep mode entirely in the printer’s energy or power settings. Some printers also have a “Wake on LAN” option that prevents this problem.
Can I print from my iPhone without installing an app?
Yes, if your printer supports AirPrint. Most printers manufactured after 2014 do. When you tap Share and then Print in any iOS app, AirPrint-compatible printers on the same Wi-Fi network appear automatically in the printer selection list. No driver or app installation is required.
My VPN is stopping me from printing. How do I fix it?
Most VPN software routes all network traffic through a remote server, which prevents your computer from seeing local devices like your printer. Enable split tunneling in your VPN settings to allow local network traffic to bypass the VPN while keeping internet traffic protected. If your VPN client does not support split tunneling, disconnecting from the VPN before printing is the simplest workaround.
How do I print from a Chromebook?
ChromeOS can discover most modern printers on your local network automatically. Go to Settings > Advanced > Printing > Printers and click Add Printer. If your printer is not discovered automatically, you can also add it by IP address using the CUPS driver option in the same menu. For cloud-based printing, ChromeOS integrates with Google Drive’s printing features.
Can I print to my home printer from outside my house?
Standard Wi-Fi printing only works when you are on the same network as the printer. For remote printing, use HP ePrint, Epson Connect, or Canon Cloud Link depending on your brand — each assigns your printer an email address so you can send print jobs from anywhere in the world. See the Cloud Printing section above for details.
Should I give my printer a static IP address?
For most households, DHCP is fine and there is no need to assign a static address. A static IP or DHCP reservation is useful if you access the printer’s embedded web server frequently, add the printer by IP address instead of letting devices discover it, or experience problems where the printer’s address changes after router restarts. See the Static IP section above for how to set this up through your router.
Is it safe to connect my printer to Wi-Fi?
Yes, with basic precautions. Make sure your home Wi-Fi uses WPA2 or WPA3 security. Set a password on the printer’s embedded web server if it does not have one already. Keep the printer’s firmware updated to receive security patches. Avoid connecting the printer to a guest network if it needs to communicate with devices on your main network.
Wireless Setup Is a Five-Minute Job Once You Know the Steps
Whichever path you took — the printer’s control panel, the manufacturer’s app, or the WPS button — the underlying goal was the same: get the printer and your other devices talking to the same home network. Once connected, adding the printer to Windows, macOS, iPhone, Android, or Chromebook is a matter of a few taps in the right settings menu, and from that point every device in the house can reach it without any additional configuration.
If you hit a snag along the way, the troubleshooting sections above cover the handful of issues that explain almost every failed connection, from 5 GHz band mismatches and sleep-mode dropouts to VPN conflicts and outdated security settings. A simple restart resolves more of them than you might expect, and clearing the printer’s saved network settings before reconnecting solves most of the rest.
And if you went through this entire process only to confirm that your current printer’s Wi-Fi hardware simply is not up to the job anymore, that is useful information too. A printer that fights you on every reconnection is rarely worth the ongoing frustration, and our buying guides above can help you find a replacement that won’t.
Browse Wireless Printers on Amazon