How to Clean Printer Heads at Home: Complete Guide
⚡ Quick Summary
- Automatic Cleaning: Run built-in cleaning cycle (1–5 minutes, easiest method)
- Manual Cleaning: Wipe nozzles with wet cotton swabs (10–15 minutes, effective)
- Deep Cleaning: Soak cartridges in distilled water (30–60 minutes, last resort)
- Results: Print head cleaning restores 80–95% print quality immediately
- Frequency: Clean when lines appear, or monthly for preventive maintenance
Why Cleaning Printer Heads Matters
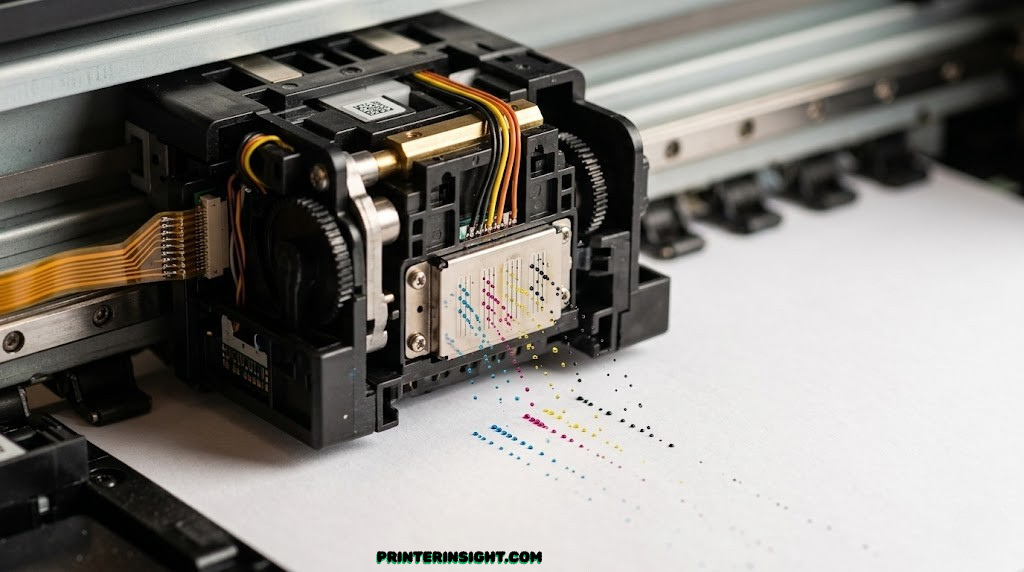
Inkjet printer heads are precision instruments containing hundreds of microscopic nozzles that spray ink onto paper. Over time, ink dries, dust accumulates, and residue builds up inside these nozzles, causing them to clog. When nozzles clog, ink can’t flow, creating white lines or completely missing colors in printed documents.
The consequences of neglect are expensive. Clogged print heads force you to replace cartridges that still contain ink—pure waste. A $50 cartridge gets discarded because four nozzles clogged, even though the remaining 400 nozzles function perfectly. Worse, clogged print heads degrade over time. Ignored for months, they can become permanently damaged, requiring professional replacement at $150–$300.
The solution is simple: periodic cleaning restores nozzle function, extends cartridge life, and improves print quality. Most cleaning takes 5–15 minutes and costs nothing beyond supplies you likely already own. This guide walks you through every cleaning method, from automatic cycles (easiest) through deep manual cleaning (most effective).
Regular print head maintenance transforms your printer from a source of frustration into a reliable workhorse. Documents print clearly, colors remain vibrant, and cartridges last longer. The investment in five minutes of cleaning every few weeks returns exponential value through improved reliability and reduced cartridge waste.
Signs Your Printer Head Needs Cleaning
Missing Colors or Lines
Print a color test image. If entire colors are missing (red prints without cyan, for example), or if white lines appear where there should be solid color, nozzles are definitely clogged. The missing color indicates that specific color channel’s nozzles are blocked.
Faded or Ghostly Print
Clogged nozzles produce weak, faint output. Text appears ghostly or semi-transparent. Solid colors appear washed out or streaky. This indicates partial clogging—some nozzles work, others don’t, creating inconsistent ink flow.
Horizontal Banding or Striping
Regular horizontal lines or gaps appear across entire pages. This pattern (rather than missing colors) suggests the print carriage isn’t moving smoothly or the paper feed has issues. However, it can also indicate multiple nozzles failing in patterns.
Printer Error Messages
Some printers display “Maintenance Required” or “Clean Print Head” messages. These aren’t suggestions—they’re alerts that the printer has detected nozzle degradation. Respect these warnings and clean immediately before damage becomes permanent.
Ink Smudging or Bleeding
When clogged nozzles suddenly release (clearing themselves), excess ink deposits on paper, causing smudges or bleeding. This is often a sign that partial clogging is occurring and deep cleaning is needed soon.
Seasonal Starting Issues
If your printer sat unused for 4+ weeks (especially over winter or summer), expect clogging when you restart. Run an automatic cleaning cycle immediately before printing important documents. This prevents costly cartridge waste on failed first prints.
Tools & Supplies You’ll Need
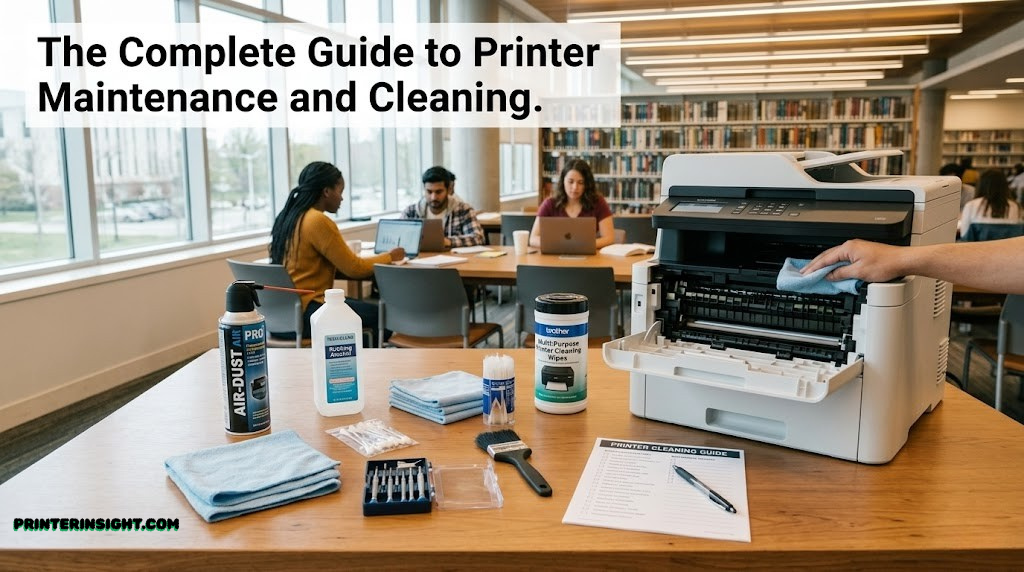
Print head cleaning requires only common household supplies. You likely own most items already:
Optional supplies that improve results: isopropyl alcohol (speeds drying), heat gun (gently warms cartridges to loosen dried ink), print head cleaning solution (commercial products designed specifically for this), and foam-tipped applicators (gentler than cotton swabs on delicate nozzles).
Method 1: Automatic Cleaning Cycle
Most modern inkjet printers include automatic print head cleaning functions built directly into the operating system. This is the easiest, safest, and first method to try. Most effective for light clogging caught early.
Step 1: Access Printer Settings Menu
On the printer itself, look for a “Menu,” “Settings,” or icon with gears. Navigate using buttons or touchscreen. You’re looking for “Maintenance,” “Tools,” or “Cleaning” options. Different printer brands use different terminology:
- HP: Look for “Maintenance” or “Tools” menu on the printer display or HP Smart app
- Canon: Access “Setup” or “Maintenance” through the printer’s control panel
- Epson: Find “Utility” or “Maintenance” in the printer menu or Epson software
- Brother: Press “Menu” and navigate to “Maintenance” options
Step 2: Select “Clean Print Head” Option
Once in the Maintenance menu, look for “Clean Print Head,” “Head Cleaning,” or “Cleaning Cycle” options. Select this option using arrow buttons or touchscreen.
Step 3: Confirm and Wait for Cycle to Complete
Press “OK” or “Start” to begin the automatic cleaning cycle. The printer will produce clicking, humming, and whirring sounds as it moves the carriage and sprays ink through the nozzles to clear blockages. Most cycles take 1–5 minutes.
Step 4: Print Test Page to Verify Results
Once the cleaning cycle finishes, the printer displays a completion message. Immediately print a color test page or a document with all colors to verify that cleaning worked. Look for solid colors with no missing lines or fading.
✓ Success Indicator
After automatic cleaning, the test page should show solid colors with no missing lines or fading. If colors still appear weak or striped, proceed to manual cleaning (Method 2). If clogging is severe, move directly to deep cleaning (Method 3).
Method 2: Manual Print Head Cleaning
When automatic cycles fail to restore print quality, manual cleaning directly targets the nozzles. This method is more involved but highly effective for moderate clogging. Best results: light to moderate dried ink buildup.
Step 1: Prepare Your Workspace
Ink is permanent and stains everything. Set up a protected workspace: cover your work table with newspaper or cardboard, have paper towels and distilled water nearby, and wear latex gloves to protect hands from permanent staining.
Step 2: Remove Print Cartridges Carefully
Turn off the printer. Open the cartridge access panel (usually beneath the printer lid). Locate the print cartridges. Press the cartridge release button or lever to unlock. Gently remove cartridges by pulling them straight out toward you. Avoid twisting or applying excessive force.
⚠ Handling Cartridges
Don’t touch the metal nozzle plate on the bottom of cartridges—oils from skin permanently damage printing. Place removed cartridges nozzle-up on paper towels. Never leave cartridges exposed for more than 15–20 minutes or nozzles will begin drying again.
Step 3: Inspect Cartridge Nozzles
Hold each cartridge nozzle-down over white paper in good light. You should see hundreds of tiny holes arranged in patterns. Look for dried ink crusting around holes or complete blockage (holes appear sealed). Some ink residue is normal; extensive crusting indicates clogging.
Step 4: Dampen Cotton Swab with Distilled Water
Dip a cotton swab into distilled water—not tap water, which contains minerals that clog nozzles further. Wring out excess water so the swab is damp, not dripping. Over-wet swabs flood the nozzle plate and cause water to seep into internal mechanisms.
Step 5: Gently Wipe Nozzles with Swab
Hold the cartridge nozzle-side-down over paper towels. Gently wipe the nozzle plate with the damp cotton swab using light pressure—don’t scrub or apply force. Wipe slowly in one direction, then flip the swab and wipe in the opposite direction. Watch as the swab picks up dark ink residue.
Step 6: Reinstall Cartridges and Run Automatic Cleaning
Replace cartridges in their original slots. Align the cartridge with its slot and push firmly until you hear a click, indicating it’s locked in place. Close the cartridge access panel. Run the automatic print head cleaning cycle one more time to flush away loosened ink residue.
✓ When to Expect Results
Manual cleaning typically restores 70–90% of print quality within one cycle. If colors still appear weak or missing after manual cleaning, deep cleaning (Method 3) may be necessary for severe, long-term clogging.
Method 3: Deep Cleaning (Cartridge Soaking)
When automatic and manual cleaning fail, deep cleaning involves soaking cartridges in distilled water to dissolve dried ink. This is the most time-intensive method but highly effective for severe, stubborn clogging that’s been ignored for months or years.
Step 1: Remove Cartridges and Prepare Soaking Containers
Remove cartridges following Method 2’s instructions. Prepare separate shallow dishes—one per cartridge color—filled with 1 inch of distilled water. Paper cups, small bowls, or ceramic saucers work well. Avoid metal containers (ink can stain permanently and metal may react).
Step 2: Place Cartridges Nozzle-Down in Water
Carefully place each cartridge nozzle-down into its corresponding water container. The nozzle plate should be fully submerged. The cartridge body remains above water to prevent liquid seeping into internal mechanisms. Set containers in a location where they won’t be disturbed for 30–60 minutes.
ℹ How Soaking Works
Distilled water dissolves dried ink crusted in nozzles. As the water sits, ink particles float into the water, gradually clearing nozzles. This process is slow but extremely effective for hardened, stubborn buildup that manual wiping can’t remove. Patience pays off with this method.
Step 3: Wait 30–60 Minutes While Water Dissolves Dried Ink
Leave cartridges undisturbed for at least 30 minutes. Longer soaking (1–2 hours) is fine and often more effective. Watch the water—it will gradually become discolored as dried ink dissolves. Dark-colored water indicates the process is working. Light pink or unchanged water suggests minimal buildup.
Step 4: Gently Swirl and Repeat Wiping
After 30–60 minutes, gently swirl each cartridge in the water (don’t shake vigorously). Remove the cartridge and wipe the nozzle with a fresh damp cotton swab. You should notice significantly less ink residue compared to initial wiping. If residue remains, place the cartridge back in water for another 15 minutes.
Step 5: Allow Cartridges to Air Dry Completely
Once nozzles are clean and water runs clear when swirled, place cartridges nozzle-up on fresh paper towels to air dry for 15–30 minutes. Complete dryness is essential before reinstalling cartridges—moisture seeping into internal circuits causes permanent damage.
✓ Deep Cleaning Results
Deep cleaning via soaking typically restores 90–100% of print quality for severe clogging. If colors still appear weak after deep cleaning, the print head may have sustained permanent internal damage requiring professional replacement.
Detailed: Safely Removing and Reinstalling Cartridges
Cartridge handling is critical. Even tiny mistakes damage nozzles permanently. Follow these procedures religiously:
Removal Process
- Turn off printer completely – Never open cartridge access while powered on
- Wait 30 seconds – Let electronics settle and carriage fully park
- Open cartridge access panel – Follow your specific printer’s design
- Locate release button or lever – Usually beneath or beside each cartridge
- Press release mechanism – Gentle pressure, not force
- Pull cartridge straight toward you – Never twist, wobble, or apply lateral force
- Place nozzle-up on clean paper towels – Don’t touch the metal nozzle plate
Reinstallation Process
- Ensure cartridges are completely dry – Wait full air-drying time before installing
- Align cartridge with slot – Position it vertically above the slot opening
- Push straight down firmly – Listen for audible click indicating proper seating
- Release is locked when you hear the click – Don’t force beyond this point
- Close cartridge access panel – Secure it fully before using printer
- Run automatic cleaning cycle – Flush away any remaining water or residue
Troubleshooting: When Cleaning Doesn’t Work
Print Quality Still Poor After All Three Methods
If colors remain faded or missing after automatic, manual, and deep cleaning, the print head likely has permanent internal damage. This requires professional repair or replacement ($150–$300). Older printers or those with extremely severe clogging may not be economically worth repair.
Water Leaked Into Printer Interior
If water dripped into the printer during cleaning, turn it off immediately and leave it unplugged for 48 hours to air dry. Never attempt to power on a potentially water-damaged printer—this causes short circuits and permanent failure.
Cartridges Won’t Seat After Cleaning
Reinstalled cartridges should click into place firmly. If they don’t seat: (1) Cartridge or slot may be damaged from rough handling. (2) Cartridge may still be wet—wait another 15 minutes before trying again. (3) Debris may be blocking the slot—examine visually and clear if needed.
Print Quality Improved But Not Fully Restored
Partial success (70–80% improvement) suggests the cartridge itself is aging and may be nearing end-of-life. Clogging issues often get worse over time as cartridges age. When quality plateaus despite cleaning, it’s usually time to replace cartridges with fresh stock.
Printer Produces Error Messages After Cleaning
Some printers display “Cartridge Not Recognized” after removal. This is normal—the printer is registering that cartridges were removed. Running the automatic cleaning cycle should clear this message. If it persists, power cycle the printer (turn off 30 seconds, turn back on).
Preventing Print Head Clogs: Best Practices
Print Regularly (Weekly Minimum)
The single best prevention: use your printer weekly, even if just to print test pages. Ink flowing through nozzles keeps them moist and prevents drying. Printers that sit unused for weeks accumulate clogs rapidly.
Run Monthly Cleaning Cycles Proactively
Don’t wait for visible clogging. Run automatic print head cleaning cycles monthly as preventive maintenance. This takes 5 minutes and costs nothing. Monthly prevention beats emergency deep cleaning every time.
Store Printer in Climate-Controlled Environment
Extreme heat, cold, or humidity accelerate ink drying. Keep printers in rooms maintained between 65–75°F with 40–60% humidity. Attics, basements, garages, and vehicles subject printers to temperature extremes that promote clogging.
Use High-Quality Cartridges
Genuine manufacturer cartridges are engineered for optimal consistency. Third-party cartridges may have inconsistent ink formulations leading to faster drying. If budget is tight, purchase quality third-party brands with good reviews rather than the cheapest alternatives.
Never Leave Cartridges Exposed for Extended Periods
If removing cartridges for cleaning or replacement, reinstall them within 15–20 minutes. Exposed nozzles begin drying immediately. Plan cartridge removal and reinstallation to minimize air exposure.
Turn Off Properly, Don’t Force Shutdown
Always use the power button for shutdown. Forcing power off (pulling the plug) can leave the carriage in the middle of the page, exposing nozzles to air. Proper shutdown parks the carriage and closes protective caps.
Printer Head Cleaning Frequently Asked Questions
For prevention: run automatic cleaning cycles monthly. For active use: clean when you notice first signs of clogging (missing colors, fading, lines). For heavy printing: weekly cleaning may be warranted. For light occasional use: quarterly cleaning is sufficient. The key is responding to visible degradation rather than ignoring it hoping it resolves on its own.
No. Using the printer’s built-in automatic cleaning function is fully supported by manufacturers and explicitly covered under warranty. Manual and deep cleaning are generally safe if you follow guidelines exactly, but if damage occurs through manual cleaning, warranty may not cover repairs. Stick to automatic cleaning methods if you want unconditional warranty protection.
Never. Tap water contains minerals (calcium, magnesium) that deposit in nozzles and cause additional clogging. Distilled water is mineral-free and won’t leave residue. A gallon of distilled water costs $1–2 at any grocery or pharmacy. The minimal cost is worth the peace of mind and guaranteed safety. Using the right water is non-negotiable.
Minimum 30 minutes, but longer is better. Soaking for 1–2 hours produces better results than 30 minutes. Overnight soaking (8–12 hours) is fine and often extremely effective for severe clogging. The water will gradually become darker as ink dissolves. Once the water appears dark with minimal additional color change, the cartridge is likely as clean as soaking will get it.
Commercial print head cleaning solutions are available and mildly more effective than plain distilled water, but plain distilled water works excellently for most situations. Cleaning solutions cost $10–20 per bottle and aren’t necessary unless you regularly deal with severe clogging. Water is perfectly adequate for routine maintenance and occasional deep cleaning.
Yes—the automatic cleaning cycle cleans without cartridge removal. Manual and deep cleaning require cartridge removal to effectively clean nozzles. For automatic-only users: running the cleaning cycle is sufficient maintenance. For serious clogging that automatic cycles don’t resolve: manual or deep cleaning requiring cartridge removal becomes necessary.
If all three methods (automatic, manual, deep cleaning) fail to restore print quality after 2–3 attempts, the print head likely has permanent internal damage. Professional repair costs $150–$300. For printers costing $200 or less, replacement is often more economical than repair. Extremely old printers or those with severe clogging damage may not be worth repairing.
Permanent damage shows as complete loss of color (one or more colors print not at all) even after manual and deep cleaning. Temporary clogging shows as fading, streaks, or partial color loss that improves with cleaning. If aggressive cleaning produces no improvement at all, the head is likely permanently damaged and needs professional service or replacement.
Always try cleaning before replacing. A $3 cleaning (time + supplies) can extend cartridge life by weeks or months. Cartridges cost $15–50+, so cleaning is economical first step. However, if a cartridge is nearly empty and clogging issues are chronic, replacement may be more practical than extended cleaning attempts.
The print carriage (which holds cartridges) is different from print heads and cartridge nozzles. Carriage-cleaning (removing dust, ink residue from internal components) requires advanced disassembly and should only be attempted by experienced users. Standard cleaning focuses on cartridge nozzles, not the carriage itself. Leave carriage work to professionals unless you have experience with printer internals.
Conclusion: Clean Heads = Happy Printing
Printer head clogging is frustrating but completely preventable through simple maintenance. The three cleaning methods covered in this guide—automatic, manual, and deep—address every severity level from light fading to severe blockage.
Start with automatic cleaning (5 minutes, zero cost). This resolves 70–80% of moderate clogging. If that fails, advance to manual cleaning (15 minutes, minimal supplies). This tackles 80–90% of remaining problems. For severe stubborn clogging, deep soaking (60 minutes, distilled water) achieves 90–100% restoration.
The key to avoiding emergency situations is prevention. Use your printer weekly. Run cleaning cycles monthly. Store in climate-controlled environments. Replace cartridges before they completely empty. Use genuine or quality cartridges. These simple habits eliminate 95% of clogging issues entirely.
When clogs do occur, aggressive early intervention (immediate cleaning on first signs of color loss) prevents progression to permanent damage. A 5-minute cleaning cycle catches problems when they’re minor and easily resolved. Ignoring degrading print quality for weeks allows dried ink to harden irreversibly inside nozzles.
Follow the methods in this guide exactly, be patient with deep cleaning, and your printer will deliver reliable performance for years. The alternative—allowing clogging to progress until the head requires $150–$300 professional replacement—costs far more than the 10–15 minutes and minimal supplies required for effective home cleaning.
🧹 Ready to Clean Your Printer?
Gather your supplies (distilled water, cotton swabs, paper towels), follow the methods outlined above, and restore your printer to like-new condition. Most cleaning takes 15 minutes or less and costs nothing. Your printer—and your wallet—will thank you.